Introduction
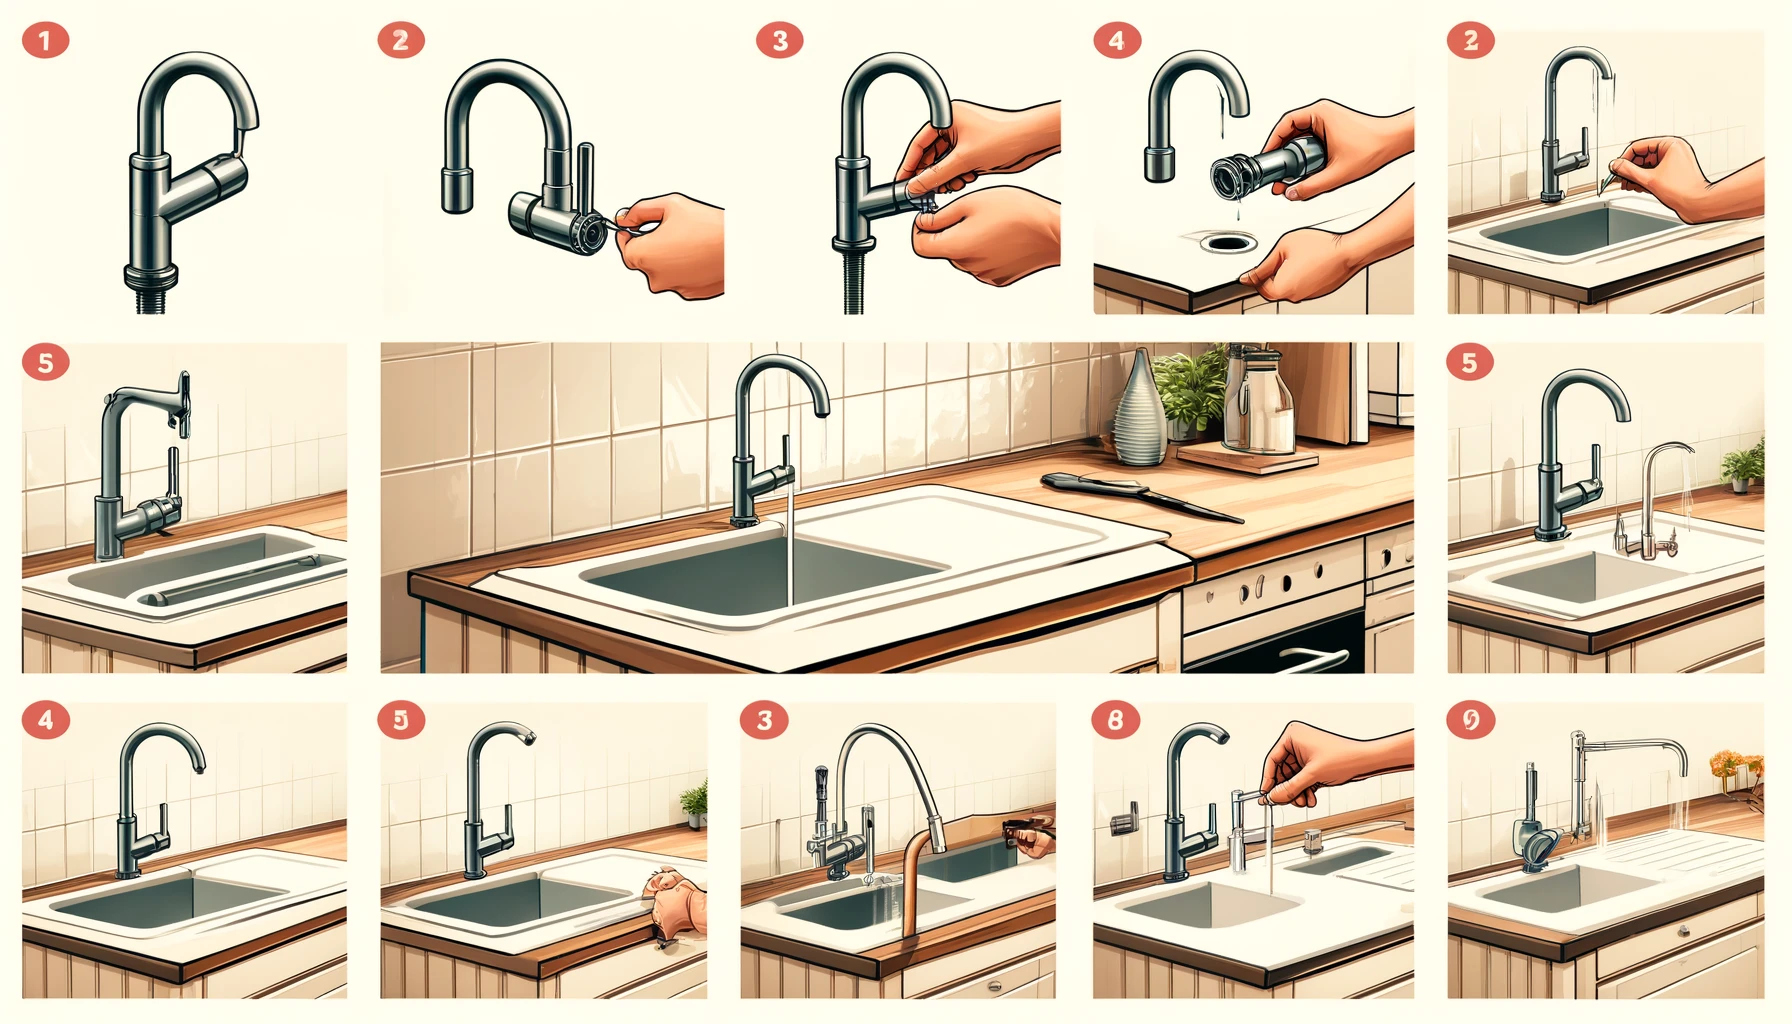
Installing a new kitchen sink faucet is an excellent way to upgrade the functionality and aesthetics of your kitchen. Whether your old faucet is leaking, outdated, or simply not meeting your needs, replacing it can improve water efficiency and add a modern touch to your space. Many homeowners assume this is a complex task requiring a professional, but with the right tools and guidance, it can be a straightforward DIY project.
This guide will walk you through the entire process, from preparation to final testing. By following these steps, you can ensure a leak-free and properly functioning faucet. With a little patience and effort, you can save money on plumbing costs and gain a sense of accomplishment from completing the installation yourself. Before starting, it’s essential to gather all necessary tools and materials to streamline the process and avoid unnecessary delays.
Step 1: Prepare for Installation
1.1 Turn Off the Water Supply
The first and most critical step in installing a new kitchen sink faucet is to turn off the water supply. Failing to do so can lead to unwanted water spills and potential damage to your kitchen. Most sinks have shut-off valves located beneath them, connected to the hot and cold water supply lines. If these valves are not present, you may need to turn off the main water supply of your home.
Once you locate the shut-off valves, turn them clockwise until they are fully closed. To ensure the water is off, turn on the faucet and check for any residual water flow. If water continues to run, double-check the valves or consult a professional before proceeding. Additionally, it’s a good idea to place a bucket or towel under the sink area to catch any residual water that may still be in the pipes.
1.2 Clear the Sink Area
Before starting the installation, clearing the sink area is crucial for an efficient workspace. Remove any cleaning supplies, trash bins, or stored items from beneath the sink to create enough room to work comfortably. If your sink area has tight spaces, consider using a flashlight to improve visibility during the installation process.
Another important step is to place an old towel or a small container under the plumbing connections. This helps in catching any drips from disconnected supply lines and prevents water damage to the cabinet. Having an uncluttered workspace will make the process smoother and reduce the risk of losing small parts like nuts and washers.
1.3 Gather Tools and Materials
Having all necessary tools and materials ready before starting the installation will save you time and frustration. The essential tools include an adjustable wrench, a basin wrench (to access tight spaces), plumber’s tape for sealing threads, and a sealant if required for your specific faucet model. If your new faucet does not come with supply lines, you’ll need to purchase compatible ones separately.
Other useful items include a flashlight for better visibility under the sink, a bucket to catch any leaks, and a towel for wiping away excess water. Organizing these tools in advance will make the installation process much more manageable and efficient.
Read More: how to install a kitchen sink faucet
Step 2: Remove the Old Faucet
2.1 Disconnect the Water Supply Lines
With the water supply turned off, the next step is to disconnect the old water supply lines. These are usually connected to the shut-off valves with compression fittings. Using an adjustable wrench, loosen the nuts by turning them counterclockwise. Be prepared for some water to drip out, so have a towel or bucket ready to catch any residual water.
If the supply lines are old and worn out, consider replacing them with new ones to prevent future leaks. After disconnecting, inspect the valves and lines for any signs of damage before proceeding with the removal of the faucet itself.
2.2 Unscrew and Remove the Old Faucet
The faucet is typically secured to the sink with mounting nuts located underneath. Using a basin wrench, loosen these nuts by turning them counterclockwise. If the nuts are corroded or stuck, applying some penetrating oil can help loosen them. Once removed, carefully lift the old faucet out of the sink.
Inspect the sinkholes for any mineral buildup or rust, which could interfere with the new faucet’s installation. If necessary, use a cleaner or mild abrasive to scrub the area and prepare a smooth surface for the new faucet.
2.3 Clean the Sink Area
Before installing the new faucet, thoroughly clean the sink area. Remove any old sealant, debris, or mineral deposits around the mounting holes. A damp cloth or mild cleaner can help remove residue, ensuring a clean surface for the new faucet’s base.
If there are any stubborn stains, using a vinegar solution or specialized cleaner can help remove them. Ensuring a clean and dry sink area before installation will help in securing a tight and stable fit for the new faucet.
Step 3: Install the New Faucet
3.1 Position the New Faucet
Place the new faucet into the mounting holes, ensuring that it is correctly aligned. Most modern faucets have a rubber gasket or seal that helps prevent leaks, but if your faucet requires additional sealing, apply a thin layer of plumber’s putty around the base.
Double-check the faucet’s orientation and ensure it sits evenly in the mounting holes. Having an extra set of hands can be useful at this stage to hold the faucet steady while securing it underneath the sink.
3.2 Secure the Faucet
Once the faucet is properly positioned, secure it using the mounting nuts provided in the installation kit. Tighten them by hand first and then use a basin wrench to ensure a snug fit. Be careful not to overtighten, as excessive pressure can damage the sink or faucet components.
If your faucet includes an additional stabilizing plate or bracket, ensure that it is properly installed to prevent wobbling. A well-secured faucet will ensure long-term durability and leak-free operation.
3.3 Connect the Water Supply Lines
Attach the hot and cold water supply lines to their corresponding valves. If your new faucet does not come with pre-attached supply lines, ensure that you are using compatible ones. Wrap the threads with plumber’s tape to create a watertight seal before tightening the connections with an adjustable wrench.
Ensure that the connections are tight but not over-tightened, as excessive force can damage the fittings. Once connected, double-check all connections before proceeding to the testing phase.
Step 4: Test the Faucet
4.1 Turn On the Water Supply
Slowly open the shut-off valves to allow water to flow into the new faucet. Check under the sink for any leaks at the connection points. If there are no immediate leaks, proceed to testing the faucet.
4.2 Run Water and Check Functionality
Turn on the faucet and test both the hot and cold settings. Observe the water flow and check for any irregularities. If the pressure is lower than expected, ensure that the aerator is clear of debris.
4.3 Check for Leaks and Make Adjustments
Inspect all connections for any signs of leakage. If you notice any drips, slightly tighten the connections or apply additional plumber’s tape to the threads. Ensuring a leak-free installation will prevent future water damage and maintenance issues.
Conclusion About How to Install a New Kitchen Sink Faucet
Installing a new kitchen sink faucet is a rewarding DIY project that can enhance the efficiency and appearance of your kitchen. By carefully following these steps, you can ensure a successful installation with minimal hassle.
To maintain your new faucet, regularly clean the aerator, check for leaks, and avoid using harsh chemicals that can damage the finish. If you encounter persistent leaks or complex plumbing issues, consulting a professional plumber is always a good option. With proper care, your new kitchen faucet will serve you efficiently for years to come.