Refinishing kitchen cabinets is an effective way to give your kitchen a fresh, updated look without the high cost of replacing cabinets. This process involves cleaning, sanding, painting or staining, and sealing the cabinets to create a durable, aesthetically pleasing finish. Whether you’re looking to modernize your kitchen or restore worn-out cabinets, refinishing is a cost-effective and rewarding DIY project.
Unlike replacing cabinets, which requires demolition and installation, refinishing allows you to work with the existing cabinet structure, making the process less invasive. It also provides a customizable approach, letting you choose colors, finishes, and hardware that match your personal style.
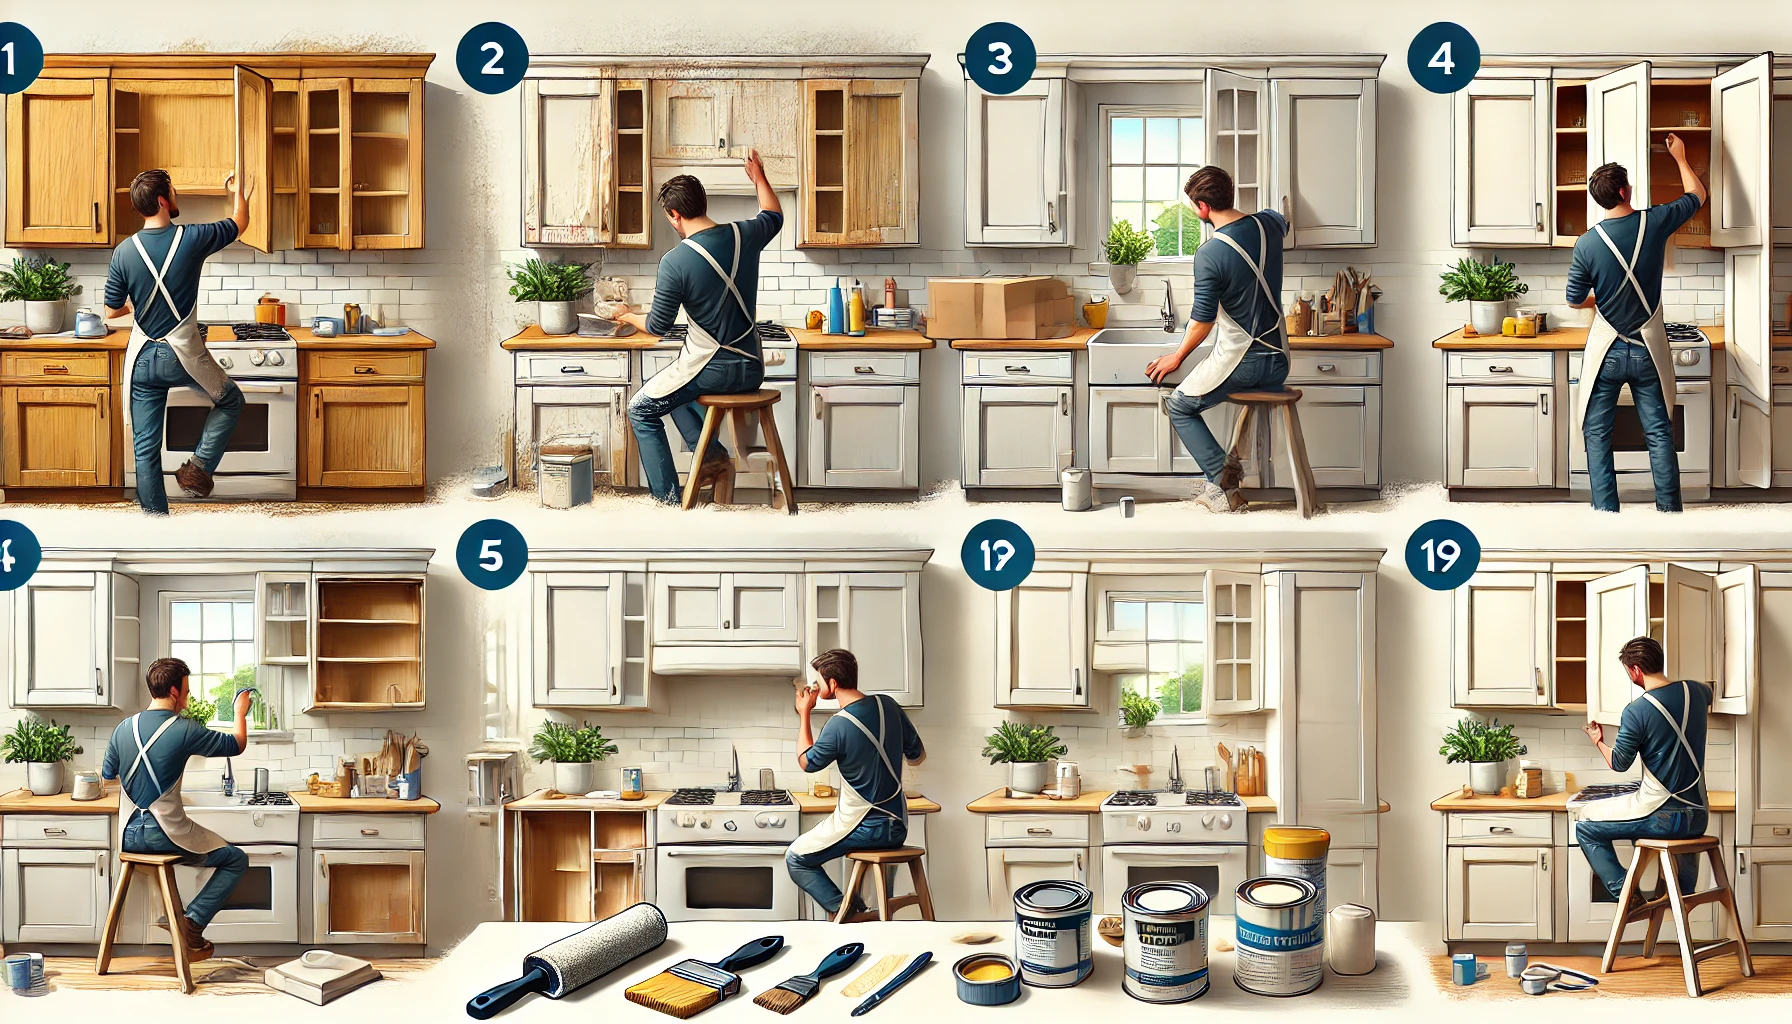
In this guide, we will take you through each step of refinishing kitchen cabinets, from preparation to reassembly. By following these steps carefully, you can achieve a professional-looking result that enhances your kitchen’s appearance.
Introduction
Kitchen cabinets are one of the most prominent features in a kitchen, and their appearance can significantly impact the overall look of your space. Over time, cabinets can become worn, scratched, or outdated, leading homeowners to consider renovations. Refinishing your kitchen cabinets is a budget-friendly alternative that can breathe new life into your kitchen without the expense of new cabinetry.
This guide will walk you through every step of the refinishing process, from removing hardware and cleaning to sanding, painting, and reassembling. With the right tools, techniques, and a little patience, you can transform your kitchen and enjoy a fresh, updated look.
Why Refinish Your Kitchen Cabinets?
Refinishing kitchen cabinets is a popular home improvement project because it offers numerous benefits. One of the biggest advantages is cost savings. Replacing kitchen cabinets can be incredibly expensive, often costing thousands of dollars, while refinishing can be done at a fraction of the price.
Additionally, refinishing allows you to customize your kitchen’s appearance. Whether you prefer a sleek modern look with a glossy painted finish or a rustic, natural wood-stained appearance, refinishing gives you full control over the final result.
Beyond aesthetics, refinishing also extends the lifespan of your cabinets. Kitchen cabinets endure daily wear and tear, and refinishing helps protect them from moisture, grease, and general use, ensuring they remain in excellent condition for years to come.
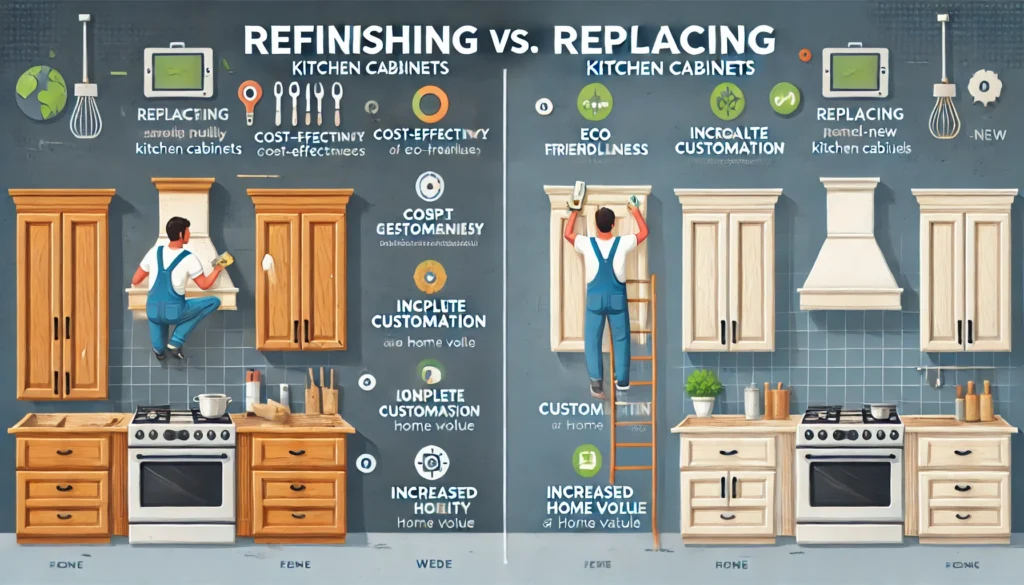
Benefits of Refinishing vs. Replacing Cabinets
Refinishing cabinets offers several advantages over replacing them. First and foremost, it is a cost-effective option. Cabinet replacements can cost anywhere from $5,000 to $25,000 or more, depending on the size of the kitchen and the materials used. Refinishing, on the other hand, typically costs only a few hundred to a few thousand dollars.
Time efficiency is another major benefit. Replacing cabinets involves demolition, installation, and sometimes even plumbing or electrical work. This can take weeks, if not longer. Refinishing, however, can be completed in just a few days.
Environmentally, refinishing is a sustainable choice. Rather than discarding old cabinets into a landfill, refinishing allows you to reuse existing materials, reducing waste and promoting eco-friendly home improvements.
Finally, refinishing provides a high level of customization. Unlike pre-made cabinets that come in limited colors and styles, refinishing allows you to choose the exact color, finish, and texture that best suits your kitchen design.
Tools and Materials Needed
Before starting the refinishing process, it’s essential to gather all necessary tools and materials to ensure a smooth workflow. Here’s what you’ll need:
Essential Tools:
- Screwdrivers or drill (for removing cabinet doors and hardware)
- Sandpaper (medium and fine grit)
- Electric sander (optional but recommended)
- Paintbrushes and foam rollers
- Tack cloth or microfiber cloth
- Painter’s tape
Materials:
- Wood cleaner or degreaser
- Wood filler (for repairing dents and scratches)
- Primer (if painting)
- Paint or wood stain
- Clear protective topcoat (polyurethane or polycrylic)
- New hardware (optional for a fresh look)
Gathering these materials beforehand will make the refinishing process more efficient and help you achieve professional results.
Read More: how to clean laminate kitchen cupboards without streaks
Step 1: Preparing the Cabinets for Refinishing
Proper preparation is crucial for a successful refinishing project. This step ensures the surface is clean, smooth, and ready for paint or stain application.
The preparation phase involves removing cabinet doors and hardware, cleaning the surfaces thoroughly, and sanding them down to remove the old finish. Skipping these steps can lead to poor adhesion of paint or stain, resulting in a subpar finish.
By dedicating time to this phase, you’ll set the foundation for a long-lasting, beautiful refinished cabinet set.
1.1 Removing Cabinet Doors and Hardware
Before refinishing, the first step is removing cabinet doors and hardware. This ensures that you can work on each surface properly without obstructions.
Start by unscrewing the hinges, handles, and knobs. It’s important to label each door and drawer so that reassembly is easier. Use painter’s tape or sticky notes to mark where each piece belongs.
Once removed, place all hardware (screws, hinges, and handles) in labeled plastic bags to prevent losing any pieces. If you plan to upgrade your cabinet hardware, now is the time to choose a new style that complements your refinished cabinets.
1.2 Cleaning the Cabinets
Kitchen cabinets are exposed to grease, food spills, and dust, all of which must be removed before refinishing. Use a strong degreaser or wood cleaner to wipe down all surfaces.
A mixture of warm water and dish soap works well for basic cleaning, while a solution of vinegar and baking soda can help remove stubborn grime. After cleaning, wipe the cabinets with a damp cloth and let them dry completely before moving on to sanding.
1.3 Sanding the Cabinets
Sanding is a critical step in refinishing because it removes the old finish and creates a rough surface for the new paint or stain to adhere to.
Start with medium-grit sandpaper (120-150 grit) to remove the existing finish, then use fine-grit sandpaper (220 grit) for a smooth final surface. If using an electric sander, move it in even strokes along the wood grain to avoid damage.
After sanding, wipe down the cabinets with a tack cloth or damp microfiber cloth to remove dust. Proper sanding ensures the finish applies evenly and lasts longer.
How Do I Refinish Kitchen Cabinets?
Refinishing kitchen cabinets is one of the most cost-effective ways to transform your kitchen without a full remodel. Instead of replacing old cabinets, refinishing allows you to refresh their appearance with a new paint or stain, extending their lifespan. This project requires patience, the right materials, and a step-by-step approach to achieve professional-looking results.
Many homeowners wonder whether refinishing is worth the effort. Compared to buying new cabinets, which can cost thousands of dollars, refinishing costs significantly less and still provides a dramatic change. Whether you prefer a modern painted look or a classic wood stain, refinishing lets you customize your kitchen’s style to fit your taste.
Below, we will walk through a detailed step-by-step guide to refinishing kitchen cabinets, from preparation to final touches.
Why Refinish Your Kitchen Cabinets?
Refinishing kitchen cabinets is an attractive option for many homeowners due to the numerous benefits it offers. Here are some key reasons why refinishing might be the best choice for your kitchen:
- Cost Savings – Refinishing is much more affordable than replacing cabinets. A full cabinet replacement can cost anywhere from $5,000 to $15,000, while refinishing typically costs between $200 and $600 for materials.
- Customization – You can choose from a variety of finishes, from bold colors to classic wood stains.
- Less Waste – Refinishing reduces landfill waste by repurposing existing cabinetry instead of discarding it.
- Quick Turnaround – Instead of waiting weeks for new cabinets to arrive and be installed, refinishing can be done in a matter of days.
- Increased Home Value – A fresh, modern look can boost your home’s resale value and make your kitchen more appealing to potential buyers.
For homeowners looking to refresh their kitchen affordably and efficiently, refinishing is a great alternative to buying new cabinets.
Benefits of Refinishing vs. Replacing Cabinets
Before diving into the refinishing process, it’s essential to understand the key differences between refinishing and replacing kitchen cabinets.
Cost Comparison
Refinishing costs significantly less than replacing. New cabinets, including materials and labor, can cost upwards of $10,000, while refinishing typically remains under $1,000 for DIYers.
Time and Effort
Replacing cabinets requires removing the old ones, adjusting plumbing and electrical fixtures, and installing new units, which can take weeks. Refinishing, on the other hand, can be completed within a few days.
Environmental Impact
Refinishing is eco-friendly, as it reduces landfill waste. Instead of disposing of perfectly functional cabinets, you are giving them a second life with a fresh look.
Refinishing allows you to retain your kitchen’s existing layout, while replacing gives the opportunity to redesign the space. If your cabinets are in good structural shape, refinishing is the smarter, more sustainable choice.
Step 1: Preparing the Cabinets for Refinishing
1.1 Removing Cabinet Doors and Hardware
Labeling Doors and Drawers for Easy Reassembly
To avoid confusion when reinstalling the cabinet doors and drawers, use painter’s tape or sticky notes to label each one. Create a numbering system or diagram to keep track of where everything goes.
Using a Screwdriver or Drill to Remove Hinges and Handles
A power drill speeds up the removal process, but a screwdriver prevents screw stripping. Carefully remove the hinges, knobs, and handles, ensuring you don’t damage the cabinet frame.
Storing Hardware Safely
Place screws, hinges, and handles in labeled plastic bags or small containers. If reusing old hardware, keep them organized for easy reinstallation.
1.2 Cleaning the Cabinets
Cabinets accumulate grease, grime, and dust over time, which must be removed before refinishing.
Importance of Removing Grease, Dirt, and Grime
If cabinets are not properly cleaned, paint or stain may not adhere correctly, leading to peeling or uneven finishes.
Best Cleaning Solutions for Wood and Laminate Cabinets
For wood cabinets, a mixture of warm water and mild dish soap works well. For stubborn grease, use a degreaser like TSP (trisodium phosphate). Laminate cabinets require a gentle cleaner to prevent surface damage.
1.3 Sanding the Cabinets
Sanding helps remove old finishes and creates a smooth surface for new paint or stain.
Choosing the Right Sandpaper Grit
- Use 120-150 grit sandpaper to remove old finishes.
- Use 220 grit for smoothing before applying the new finish.
Using an Electric Sander vs. Hand Sanding
An electric sander speeds up the process and ensures even sanding. However, hand sanding is necessary for detailed areas and edges.
Wiping Down Cabinets After Sanding
Use a damp cloth or tack cloth to remove dust before applying the new finish.
Read More: how to clean laminate kitchen cabinets without streaks
Step 2: Choosing and Applying a Finish
2.1 Selecting the Right Finish
Paint vs. Stain: Which Is Best for Your Kitchen?
- Paint: Ideal for modern looks, covers wood grain.
- Stain: Enhances natural wood beauty, requires more maintenance.
Popular Color Trends and Wood Stain Options
White and gray paints are popular, while dark walnut and espresso stains remain classic choices.
2.2 Applying a Wood Stain (If Staining Instead of Painting)
Using a Wood Conditioner for Even Absorption
Conditioner helps stain penetrate evenly, preventing blotches.
Applying Stain with a Brush or Cloth
Apply thin coats in the direction of the wood grain.
Letting the Stain Dry and Applying Additional Coats If Needed
Wait at least 24 hours before applying a second coat.
2.3 Priming the Cabinets (If Painting Instead of Staining)
Why Primer Is Necessary for Durability
Primer ensures the paint adheres properly and lasts longer.
Choosing the Right Type of Primer for Wood, Laminate, or MDF Cabinets
Oil-based primers work best for wood, while water-based primers are suitable for laminate.
2.4 Painting the Cabinets
Choosing the Right Type of Paint (Oil-Based vs. Latex vs. Chalk Paint)
Oil-based paint is durable but takes longer to dry, while latex is easier to work with.
Using a Brush, Roller, or Spray Gun for a Smooth Finish
A spray gun provides the smoothest finish, but a roller is a good alternative.
2.5 Applying a Protective Topcoat
A clear topcoat protects the finish from scratches and moisture damage.
Step 3: Reassembling and Final Touches
3.1 Reattaching Cabinet Doors and Hardware
Align hinges properly before securing them to ensure doors open and close smoothly.
3.2 Inspecting and Touching Up
Check for drips or uneven paint and sand down imperfections before applying final touch-ups.
3.3 Cleaning Up and Enjoying Your New Cabinets
Dispose of paint and stain properly, and allow cabinets to dry completely before use.
Conclusion About How Do I Refinish Kitchen Cabinets?
Refinishing kitchen cabinets is a cost-effective way to transform your kitchen without replacing cabinetry. With the right preparation and materials, you can achieve a professional-looking finish. Whether you choose paint or stain, refinishing allows you to customize your kitchen’s look while saving money.