
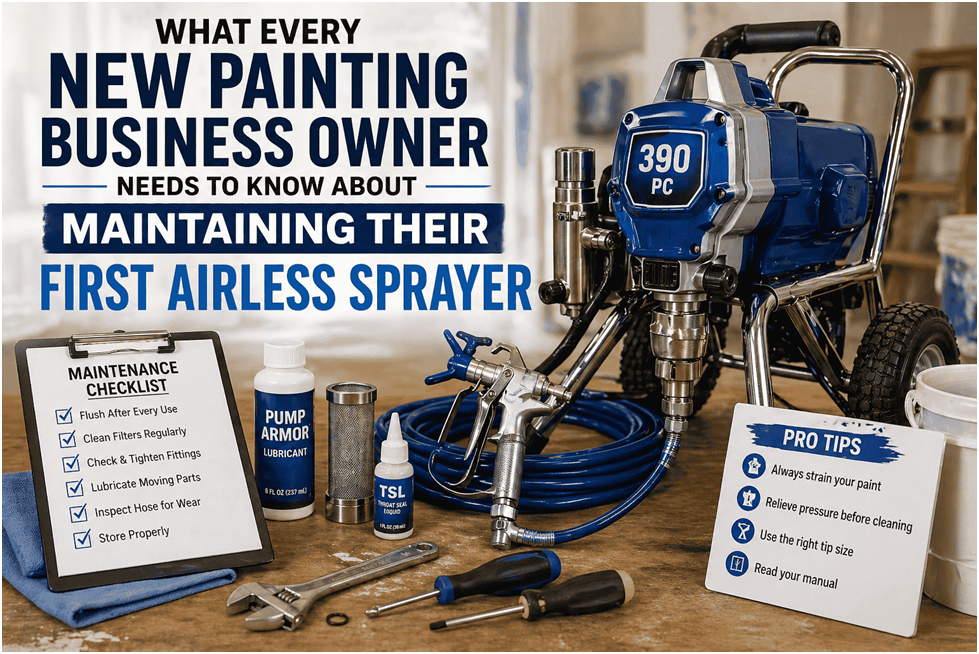
You bought your first airless sprayer. Maybe it’s a Graco 395 PC you found used from a retiring contractor, or a brand-new 390 that came with a few free tips from your local paint store. Either way, you’ve crossed from the “brush-and-roller-only” world into a category of painting that can transform your production speed, your job scope, and your revenue — once you get comfortable with the machine.
Here is what nobody told you in the store, and what you won’t figure out until the machine fails at the worst possible moment if you don’t read this first: the sprayer’s service life is almost entirely determined by what you do to it before and after you spray, not during. The spraying itself is the easy part. The cleaning, the storage, the filter management, the TSL, the Pump Armor — these are the habits that separate contractors who keep machines running for eight to twelve years from those who are at the service centre twice a year paying for repairs that were entirely preventable.
This guide covers every maintenance concept a new painting business owner needs to understand, in the order you need to understand them, without assuming you’ve ever rebuilt a pump or even changed a gun filter before.
First, Understand What Your Sprayer Actually Is
An airless paint sprayer is a high-pressure pump. That’s it. A motor drives a piston that reciprocates inside a cylinder, creating suction on the intake stroke that draws paint from your bucket through the inlet valve, and pressure on the discharge stroke that pushes that paint up the hose and through the spray tip at anywhere from 1,500 to 3,300 PSI.
At those pressures, the machine atomises paint — breaks it into tiny droplets that disperse evenly across the surface. That’s what produces the spray pattern you see, and it’s what makes the sprayer dramatically faster than a roller on open surfaces.
The flip side of that pressure is safety. An airless sprayer running at 3,000 PSI will inject paint through your skin if you touch the spray tip or put your hand in front of the gun. This is called an injection injury, and it is a medical emergency — not a cut or a surface wound. Paint injected under the skin causes severe damage and requires immediate surgical treatment. This is documented in every Graco manual, and it’s not a warning to skim past. Always engage the trigger lock when you’re not actively spraying. Never clear a tip clog by reversing it without pointing it into a waste bucket first. Never put your hand near the tip, even when you think the pressure is off. Before cleaning, servicing, or adjusting anything on the gun, release pressure fully: turn off the machine, set the prime valve to PRIME, and trigger the gun into a waste bucket until flow stops completely.
With that foundational understanding in place, here’s everything else you need to know.
The Single Most Important Maintenance Habit: Clean It Immediately After Every Job
If you take one thing from this entire guide and build it into your routine starting today, make it this: flush your sprayer completely with clean water (for latex) or mineral spirits (for oil-based) immediately after you finish spraying, before you do anything else, every single time without exception.
Not “when you get back to the shop.” Not “after dinner.” Not “tomorrow morning before the next job.” Immediately after the last trigger pull of the day.
Here is why this is non-negotiable: latex paint begins drying inside a spray system within an hour or two, faster in warm weather, faster in low humidity. The gun filter — a tiny mesh inside your gun handle — can have paint dried into it by the time you get home from a job if you wait. The manifold filter housing, the inlet strainer, the passages in the gun body — all of these can accumulate dried paint residue that causes pressure drops, tip clogs, and priming problems on the next job. In a worst case, paint dried in the pump’s fluid section requires pump disassembly to clear, which is a 45-minute-minimum repair that costs you the first production hours of the next day.
The cleaning procedure for water-based latex paint is straightforward and takes about twenty minutes if you do it right the first time:
Lift the suction tube out of the paint bucket and let it drain back into the bucket for a moment. Then trigger the gun into the bucket to return as much paint from the hose back into the bucket as possible — this recovers paint you paid for and reduces how much flushing is needed. Move the suction tube to a clean bucket of water. Set the prime valve to PRIME and turn the machine on at minimum pressure, letting water circulate through the pump. Switch to SPRAY and trigger the gun into a waste bucket until the water running through the gun shows significantly reduced colour. Fill a second clean bucket of water and repeat until the gun runs clear. Then remove the gun filter, rinse it under running water, and use a small brush to clear the mesh. Remove the tip and tip guard and rinse them separately. Remove the inlet strainer from the suction tube and rinse it clean.
After everything has been flushed clean with water, the final step — the step most new contractors skip — is filling the system with Pump Armor and cycling it through. More on Pump Armor in the storage section.
For oil-based paints and stains, substitute mineral spirits for water throughout the entire process. Use two buckets of mineral spirits — a dirty-flush bucket and a clean-flush bucket. Dispose of used mineral spirits according to local regulations; don’t pour it down the drain.
TSL: The One Accessory You’ll Wonder How You Didn’t Know About
If you bought a Graco contractor-grade sprayer — a 395 PC, 490 PC Pro, 595 or similar — your machine has a small reservoir at the top of the pump assembly called the wet cup or TSL cup. TSL stands for Throat Seal Liquid. It is a viscous, amber-coloured lubricant that you pour into this cup, and it exists for one critical purpose: keeping the packing nut area and piston rod lubricated and clean.
Every time the piston rod moves through the packing assembly, it passes through the wet cup area. TSL maintains a thin lubricating film at this interface, which does three things: it reduces friction-driven wear on the packings, it dissolves any paint residue that migrates upward from the fluid section, and it keeps the rod clean so abrasive dried paint doesn’t act as a grinding compound against the packings.
The rule: fill the TSL cup at the start of every day you spray. During extended production days — priming a whole house, spraying a commercial floor — top it off at midday. The cup should never run dry while the machine is operating.
What happens when TSL runs dry? The packings wear at an accelerated rate from unlubricated rod movement, paint residue dries at the rod interface and begins grinding into the cylinder bore, and you find yourself replacing packings at half the service interval you’d otherwise get. Packings that should last 300+ hours wear out at 100–150 hours on a machine with a consistently dry TSL cup.
TSL is not expensive — a bottle costs roughly $10–$15 and lasts weeks of active spraying. The packing kit it protects costs $65–$80. The cylinder damage that a neglected TSL cup can eventually cause costs $150–$250 to repair. The math is not subtle.
If your machine is a homeowner-grade Magnum X5 or X7, it does not have a TSL cup — that series uses a different packing system. The TSL habit applies specifically to contractor-grade machines with the packing nut wet cup design.
Understanding the Components That Wear Out and Why
Your sprayer has a predictable hierarchy of wear. Understanding it removes the mystery from most maintenance decisions.
Spray tips wear first, before anything else, and they wear gradually. The tip orifice starts as a precise round hole — a .017-inch orifice is exactly .017 inches in diameter. Every gallon of paint that passes through abrades that orifice slightly. Over time, the round hole becomes slightly oval, and an oval orifice produces a fan pattern that is shorter and fatter than the tip was designed to produce. The fan that should be ten inches long becomes eight inches, then six, while getting progressively fatter. You end up applying more paint per square foot than you intended, which means higher material cost and potentially uneven film build.
The test: periodically spray a test pattern onto cardboard and measure the fan width against what the tip is rated for. When the fan has collapsed 25% from its original size, replace the tip. For a new painting business, the practical rule is: replace tips annually if you’re spraying moderate volume, or more frequently if you’re doing heavy production. Keep two spare tips of each size you regularly use so you can swap immediately when you notice degradation rather than at the first opportunity.
Gun filters are the next thing. They are small mesh screens inside your gun handle that catch any debris in the paint before it reaches the tip. A dirty gun filter restricts paint flow and produces pressure that’s lower at the gun than at the machine — symptoms that get misdiagnosed as pressure control problems or packing wear. In reality, a two-minute gun filter cleaning resolves most mysterious “machine is running but spray pattern is weak” complaints from new sprayer users.
Pull the gun filter out at the end of every job. Rinse it under running water. Look at it against the light — you should be able to see clearly through the mesh. If you can’t, it needs to be replaced. Keep ten spare gun filters in your parts bag. They cost $5–$12 each, and being without one when the old one is clogged means your next job starts late.
The manifold filter (also called the manifold strainer or InstaClean filter on some Graco models) sits between the pump outlet and the hose. It catches larger debris before it enters the hose. This filter gets loaded more slowly than the gun filter but needs to be cleaned after every few jobs and replaced when the mesh is damaged or won’t fully clear with cleaning.
The inlet strainer sits at the bottom of the suction tube where paint enters the pump. Cleaning this after every job prevents debris from entering the pump’s fluid section, where it can damage the check ball seats. Many tip clogs and pressure irregularities trace back to an inlet strainer that hasn’t been cleaned in weeks.
Pump packings are the seal assembly inside the fluid section that maintains pressure during spraying. They wear gradually over hundreds of hours of use, and the symptom of worn packings is subtle at first: the machine cycles faster than it used to when holding pressure with the trigger released, meaning it’s cycling every five or ten seconds instead of every fifteen to twenty. As they wear further, pressure becomes inconsistent, spray pattern deteriorates, and eventually paint begins leaking at the packing nut — the most obvious sign of packings that have passed their service limit.
Don’t wait for paint at the packing nut. That’s a corrective signal, not a maintenance one. The machine is telling you it needed service several hours ago. Watch the cycling behaviour instead: when you notice the machine cycling noticeably faster than it did when the packings were fresh, it’s time to order a packing kit.
For a new painting business doing moderate residential work — perhaps 30–50 gallons of latex per week — expect to replace packings annually, sometimes every 18 months depending on what materials you spray and how diligently you maintain TSL.
Inlet and prime valves wear on a longer cycle than packings. The inlet valve (the check ball and seat at the bottom of the pump) can develop wear that makes priming inconsistent — the machine needs more strokes to draw paint up, or loses prime intermittently when the paint level drops in the bucket. The prime valve (the lever or knob that switches between PRIME and SPRAY mode) can develop bypass failure, allowing paint to return to the bucket when you’re in spray mode. Both of these are field-repairable with a kit that costs $85–$116 and takes 20–30 minutes to install.
Pump Armor: The 15-Dollar Habit That Protects a 1,500-Dollar Machine
Pump Armor is a water-soluble storage fluid that you run through the pump before putting the machine away after any job. It does three things: it lubricates the packings and internal metal surfaces during storage, it prevents corrosion in the carbon steel components that would otherwise develop rust from water-based residue, and it provides freeze protection down to -30°F for machines stored in unheated spaces.
The application process takes three minutes. After the machine is completely flushed clean, place the suction tube in a small amount of Pump Armor (a quart bottle has the right opening to fit most suction tubes directly), turn the machine on at minimum pressure, and cycle Pump Armor through the pump until it runs through the gun and hose. Leave it in the system — don’t flush it out. When you start the machine next time, the Pump Armor mixes harmlessly with your next material without any additional purge cycle for water-based applications.
The failure mode this prevents: machines stored without Pump Armor after water-based applications develop rust on internal steel components, dried residue at the inlet valve ball seat, and hardened packing material from drying and lack of lubrication. When you pull the machine out for the next job, the inlet valve ball may be stuck to its seat (machine won’t prime), the packings may have lost flexibility from drying (pressure loss from the first stroke), or there may be rust particles in the fluid section that damage the cylinder bore.
For a new business that may not use the sprayer every day, Pump Armor is not optional between uses. Any time the machine sits more than two or three days without being run, Pump Armor should be in the system. For storage periods of a week or more, always run Pump Armor through before putting the machine away.
A quart of Pump Armor costs approximately $15 and is enough for dozens of storage cycles. It is one of the highest-ROI accessories you can keep in the truck.
Learning to Read the Machine: What Problems Actually Mean
One of the most useful skills for a new sprayer owner is recognising what symptoms mean before calling for service or ordering parts. Most sprayer problems have characteristic presentations that point to specific causes.
“Machine won’t prime / won’t draw paint up from the bucket.” Start with the simplest things first. Is the suction tube fully submerged in the paint? For stand-mounted machines, is the bucket positioned correctly? Is the paint level too low — some machines struggle to prime when less than 2–3 inches of material is left in the bucket. Is the inlet strainer clogged? Pull it out and check. Is the inlet valve ball stuck? If the machine has been sitting without Pump Armor, use the pencil-tip trick: insert the tip of a pencil into the pump inlet and gently push to free the ball from its seat. If the ball is stuck from dried material, this often frees it for another service interval. If it won’t free or immediately sticks again, the inlet valve kit is the correct fix.
“Machine primes and runs but won’t build adequate pressure.” Check the gun filter first — a clogged gun filter is the single most common cause of this symptom and the most commonly overlooked. Then check the tip: is it in SPRAY position (not the UNCLOG position)? Is the tip significantly worn (oval orifice)? If filters and tip are clean and positioned correctly, look at the prime valve — if paint is returning to the bucket when you’re in SPRAY mode, the prime valve seat is leaking. If all of those check out, the packings are likely worn and need replacement.
“Machine builds pressure but spray pattern has tails / fingers at the edges.” The fan edges are heavier than the centre — this looks like cat-ear whiskers at the ends of the fan. Most commonly caused by too-low pressure for the material viscosity. Increase pressure incrementally until the tails disappear. If tails persist at higher pressure, the tip is worn and needs replacement.
“Machine cycles extremely fast even at low pressure.” Worn packings almost certainly. When packings lose their sealing integrity, pressure bleeds down rapidly between strokes, causing the machine to cycle frequently to maintain set pressure. The cycling rate tells you how urgently the packings need service — five-second cycling means service soon; two-second cycling means service today.
“Paint is leaking at the packing nut area.” Packings are worn past their service life. Service immediately — paint at the rod creates abrasive contamination that damages the cylinder bore if you continue running the machine.
“Spray pattern is fine but machine stops and restarts unpredictably.” The motor is thermal cycling — overheating and shutting down protectively. Most commonly caused by too-large a tip for the machine’s rated capacity, running the machine at maximum pressure for extended periods, or operating in very high ambient temperatures. Let the machine cool, reduce tip size if you’re at the machine’s limit, and check that the motor area isn’t clogged with dust or debris that’s reducing airflow.
The Right Tip for the Right Job: A New Contractor’s Quick Reference
New sprayer owners frequently underestimate how much tip selection affects both result quality and machine longevity. A tip that’s too large for the machine makes it work harder than it should. A tip that’s too small for the material causes tip clogs. Neither is productive.
Understanding tip codes: Every RAC spray tip has a three-digit code. The first digit multiplied by two gives you the fan width in inches. The last two digits are the orifice size in thousandths of an inch. A 517 tip produces a 10-inch fan with a .017-inch orifice.
The machine’s maximum tip size is not a suggestion. Your Graco 395 PC is rated for a maximum .023-inch orifice. Running a .027 tip on a 395 PC pushes the pump harder than it was designed for, reduces packing life, and produces inconsistent pressure because the pump can’t keep up with the material volume demanded. Stay within the rated maximum for your specific machine.
Common tip choices for new residential painting businesses:
For interior walls and ceilings with standard latex flat or eggshell: a 515 or 517. The 517 covers more per pass on open wall surfaces; the 515 gives slightly better control in smaller rooms.
For trim, doors, and cabinets with semi-gloss or enamel: a 410 or 412. Narrower fan, smaller orifice, better control on detailed surfaces.
For exterior with standard latex: a 517 or 519 depending on the substrate.
For primer on drywall: a 515 or 517. Standard latex primer at spraying consistency passes through these without clogging.
Keep tip sizes corresponding to your most common jobs. Don’t carry every tip Graco makes — carry three or four sizes that cover 90% of your work, plus two spares of each.
The Beginner Mistakes That Send Machines to the Service Centre
Based on the documented experience of paint equipment service centres — where, as one service manager has noted, “most of our repair business is due to lack of cleaning, improper cleaning, neglect and misuse” — here are the specific mistakes that most commonly damage new contractors’ first sprayers:
Leaving paint in the machine overnight. This is the number one cause of damage to first-year painters’ equipment. One overnight with latex paint in the gun, filters, and hose can create clogs that take hours to clear. In the pump itself, overnight exposure can cause enough residue buildup that the machine won’t prime correctly the next morning. Clean every time.
Skipping Pump Armor before storage. The second most common cause. Any machine that sits in a garage, truck, or van without Pump Armor risks dried residue and, in winter, freeze damage. The repair from freeze damage — cracked cylinder, split hose, damaged fittings — costs $200–$500. Pump Armor costs $15.
Using metal objects to clear tip clogs. A clogged tip is not a nail hole — it requires a soft brush and soaking, not a pin or wire. A metal tool scratches the precision orifice and permanently changes the spray pattern. The fix costs $15–$25 for a new tip. The temptation to jam a wire in there to save that $20 costs $20.
Running the wrong solvent. Water flushes water-based latex. Mineral spirits flush oil-based paints and stains. Running water through a machine that was just used with oil-based material doesn’t clean it — it creates an emulsion that’s harder to clear than either material alone. Running mineral spirits through a machine used primarily for latex doesn’t hurt it but is unnecessary. Know what you sprayed and use the appropriate solvent.
Ignoring pressure leaks. If paint is weeping at a fitting, dripping from the gun handle, or appearing at the packing nut, the machine is telling you something needs attention now. Most new contractors’ instinct is to keep the machine running until the job is finished. In most cases, this is fine for leaks at threaded fittings — tighten the fitting or replace the O-ring. Paint at the packing nut should stop the machine for service, not be tolerated until the job is done.
Cranking pressure to maximum as the default. Higher pressure doesn’t always mean better results. More pressure means more overspray, faster tip wear, and more wear on the pump packings. The correct pressure for any job is the lowest pressure that produces a clean fan pattern. Start at minimum, increase until the fan looks even and uniform with no tailing at the edges — that’s your working pressure. It’s often significantly lower than the machine’s maximum.
Building Your Maintenance Kit: What to Keep in the Truck
As your business grows past the first few months, you’ll naturally develop a sense of what fails and when. Before that experience accumulates, here’s the starter kit that covers the most common field needs for a Graco contractor machine:
One packing kit (18B260) — the foundational fluid section rebuild kit for most Graco contractor machines from the 390 through the 595 and Ultra Max II 490/495/595. Costs $65–$80 from an authorized distributor. When packings start showing wear symptoms, you want this kit on the truck so you can rebuild at a scheduled maintenance time rather than the morning of a job.
One inlet valve kit (239922) — addresses the most common priming failure. Costs $87–$95. Faster to have it on the truck than to order it when you’re standing in front of a machine that won’t prime.
One prime valve kit (235014) — addresses the prime valve failure mode. Costs $91–$116. The machine that “runs fine but won’t build pressure even with fresh packings” usually needs this.
Gun filters × 10 — the highest-volume consumable. Replace after every job or every other day of heavy use. Never be without them.
RAC X spray tips in your working sizes × 2 spares each — tip wear is gradual and you may not notice until it’s significantly degraded. Fresh tips are immediate diagnostic tools: if swapping the tip fixes the problem, the tip was the problem.
TSL × 1 bottle — fill the wet cup every morning and mid-day during heavy use.
Pump Armor × 1 bottle — goes in the machine before every storage period over three days.
The total cost of this starter kit is approximately $350–$450. It is the toolkit that keeps a $1,200–$1,600 machine running for years instead of failing in its first season.
All of these parts are available as genuine OEM Graco components from SprayersAndParts.com — an authorized Graco dealer based in Houston, Texas — with same-day shipping on qualifying orders placed before 1pm CST. If you need to confirm which specific part numbers are correct for your machine model and series letter, the interactive Graco parts diagram lets you navigate to your exact machine and click on the component you need for instant part number confirmation. For new business owners who aren’t yet familiar with their machine’s series letter or parts configuration, the technical support team at 713-931-4102 can assist Monday through Friday, 8am–4pm CST.
The Long View: What Good Habits Add Up To
The painting contractors who keep their equipment running for a decade without major repairs — the ones who can hand you a 395 PC that they bought eight years ago and it still holds pressure like new — all share the same characteristic: they made the maintenance habits automatic rather than optional.
They clean the machine every day, without debating whether it really needs it. They fill the TSL cup every morning without thinking about it. They run Pump Armor before every storage period as a matter of reflex. They watch the cycling rate instead of waiting for paint at the packing nut. They keep spare filters and a packing kit in the truck at all times.
None of these habits are difficult or time-consuming. The daily flush takes twenty minutes. The TSL fill takes thirty seconds. The Pump Armor cycle takes three minutes. In total, proper sprayer maintenance requires approximately thirty minutes at the end of every spray day.
Against a machine that generates $400–$800 in billable work per day and is meant to last ten years, thirty minutes of daily maintenance is the most productive half-hour in your business.