Installing a kitchen sink faucet might seem like a daunting task, but with the right tools and instructions, it can be a straightforward process. Whether you’re replacing an old faucet or installing a brand-new one, following a structured guide can help ensure a leak-free and functional installation. This guide will walk you through the entire process, from preparation to troubleshooting, ensuring that you get the job done efficiently.
A properly installed kitchen faucet not only improves functionality but also enhances the look of your kitchen. With the right tools and some patience, you can complete this installation without needing a plumber, saving both time and money.
Introduction
A kitchen faucet is one of the most frequently used fixtures in your home. It serves as the main source of water for cooking, cleaning, and various other tasks. Over time, faucets can wear out, develop leaks, or become outdated, requiring a replacement. Proper installation is crucial to ensure smooth operation and prevent future plumbing issues.
This guide will provide step-by-step instructions to help you install your kitchen faucet correctly. Whether you are a DIY enthusiast or a beginner, you will find detailed explanations that make the process easy to understand.
Importance of a Properly Installed Faucet
A properly installed faucet ensures that water flows efficiently without leaks or drips. Improper installation can lead to water damage, mold growth, and costly repairs. A secure faucet also prevents unnecessary movement and ensures durability. Here are some key benefits of a well-installed faucet:
- Prevents Water Leaks: A properly sealed faucet prevents leaks that can cause structural damage.
- Ensures Water Efficiency: A good installation ensures proper water pressure and reduces wastage.
- Enhances Kitchen Aesthetics: A new faucet can improve the overall look of your kitchen.
- Increases Lifespan of Plumbing Fixtures: Correct installation reduces wear and tear, extending the life of your faucet.
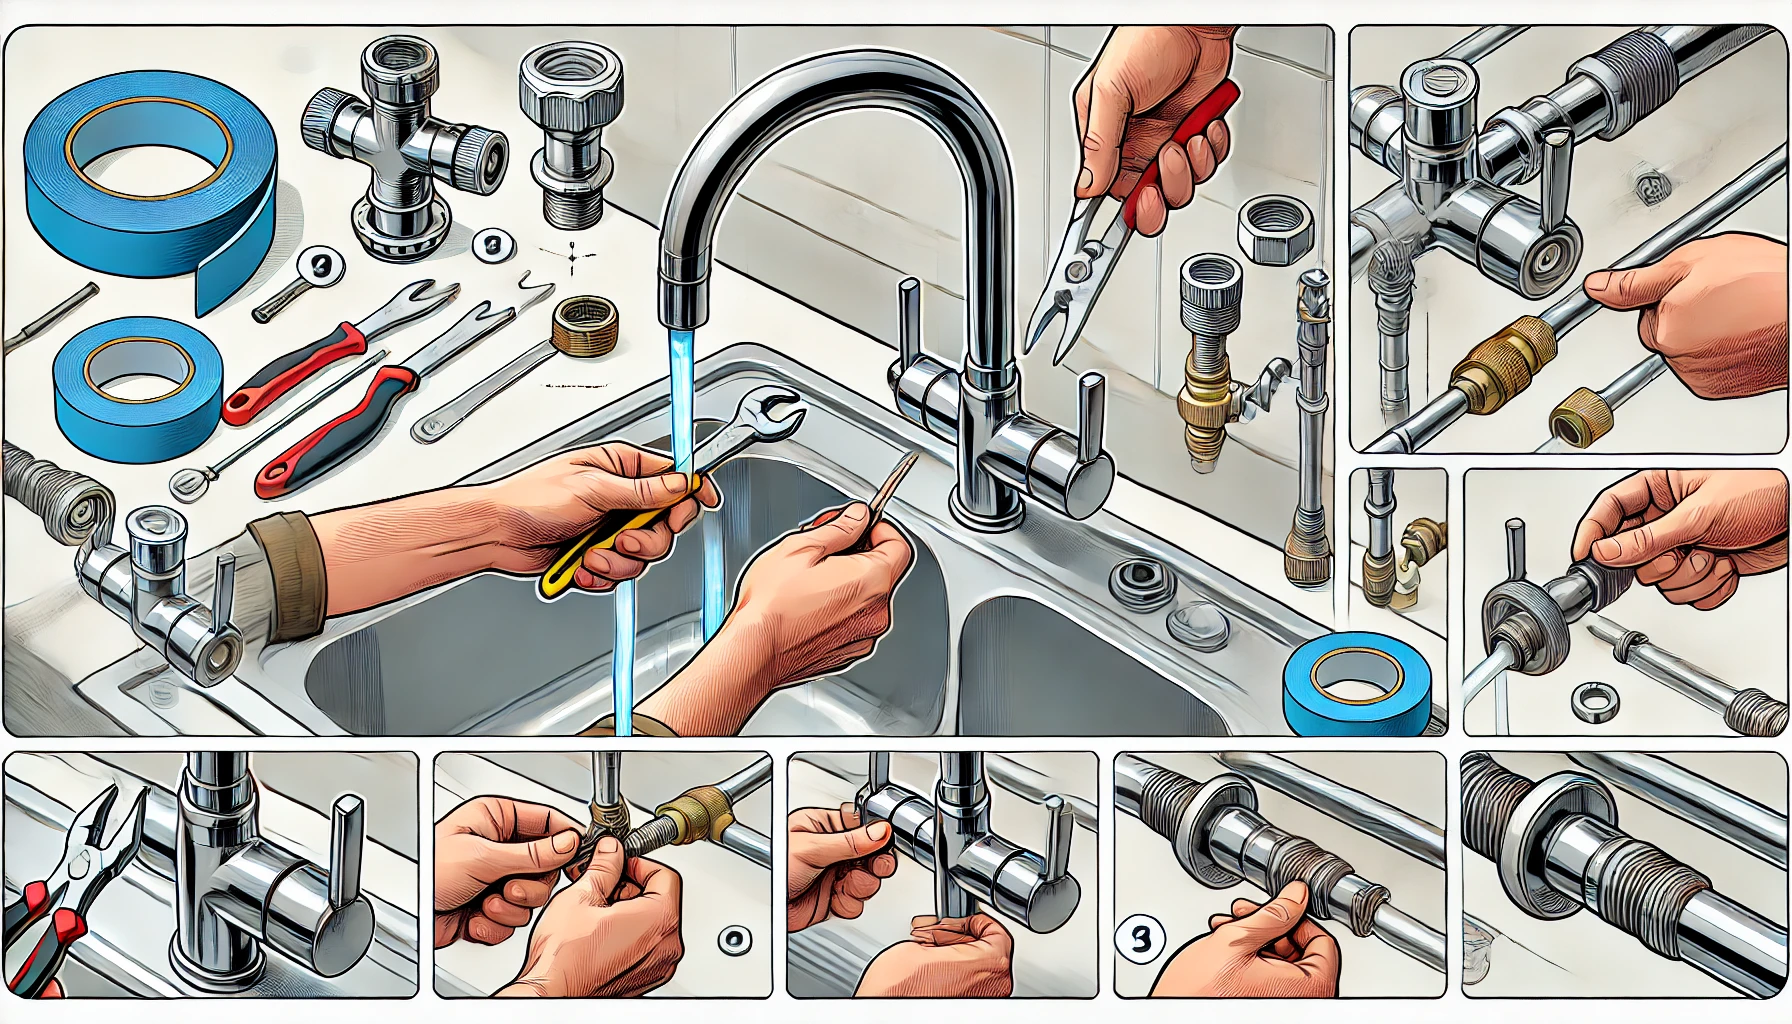
Tools and Materials Needed
Before beginning the installation process, gather the following tools and materials to make the job easier:
Essential Tools:
- Adjustable wrench
- Basin wrench
- Screwdriver (Phillips and flathead)
- Plumber’s tape
- Plumber’s putty or silicone caulk
- Bucket or towel (to catch excess water)
Materials Required:
- New kitchen faucet
- Supply lines (if not included with the faucet)
- Mounting hardware (nuts and washers)
- Gasket (if required)
Having all these tools and materials ready beforehand will help streamline the installation process and prevent unnecessary delays.
Estimated Time to Complete the Installation
The time required to install a kitchen sink faucet depends on experience level and complexity. For beginners, the process may take 1.5 to 2 hours, while experienced DIYers can complete it in about 30–45 minutes. Factors affecting installation time include:
- Type of faucet – Single-handle or dual-handle faucets may have different installation requirements.
- Existing plumbing conditions – Removing an old faucet with rusted bolts can be time-consuming.
- Additional repairs – If there are leaks or damaged pipes, extra time may be needed for repairs.
To ensure a smooth process, set aside ample time, follow the instructions carefully, and be prepared for potential challenges.
Step 1: Preparing for Installation
1.1 Turn Off the Water Supply
Turning off the water supply is the first and most important step before starting the faucet installation. This prevents accidental leaks or water damage.
Locating the Shutoff Valves
Most kitchen sinks have shutoff valves located underneath the sink. These valves control the water flow to the faucet. If you cannot find them, you may need to shut off the main water supply.
Draining Excess Water from the Lines
Once the water is turned off, open the faucet to drain any remaining water from the pipes. This helps release pressure and prevents water from spilling when disconnecting the supply lines.
1.2 Remove the Old Faucet
Before installing the new faucet, the old one must be removed carefully. This step may require some effort, especially if the faucet has been in place for a long time.
Disconnecting the Water Supply Lines
Use an adjustable wrench to loosen the nuts connecting the water supply lines to the faucet. Place a bucket underneath to catch any remaining water.
Removing Mounting Nuts and Securing Hardware
Faucets are usually held in place with mounting nuts located under the sink. Use a basin wrench to loosen and remove them. If the nuts are rusted, applying a penetrating lubricant can help.
Lifting Out the Old Faucet
Once the nuts and supply lines are disconnected, gently lift the old faucet out of the sink. If it is stuck due to sealant or corrosion, use a putty knife to loosen it.
1.3 Clean the Sink Area
Before installing the new faucet, it is essential to clean the area where the old faucet was mounted.
Removing Old Caulk and Debris
Scrape off any remaining plumber’s putty, caulk, or mineral deposits. A mild cleaning solution can help remove stubborn stains.
Ensuring a Smooth Surface for Installation
A clean and smooth surface ensures that the new faucet sits evenly and creates a watertight seal. Wipe the area dry before proceeding.
Step 2: Installing the New Faucet
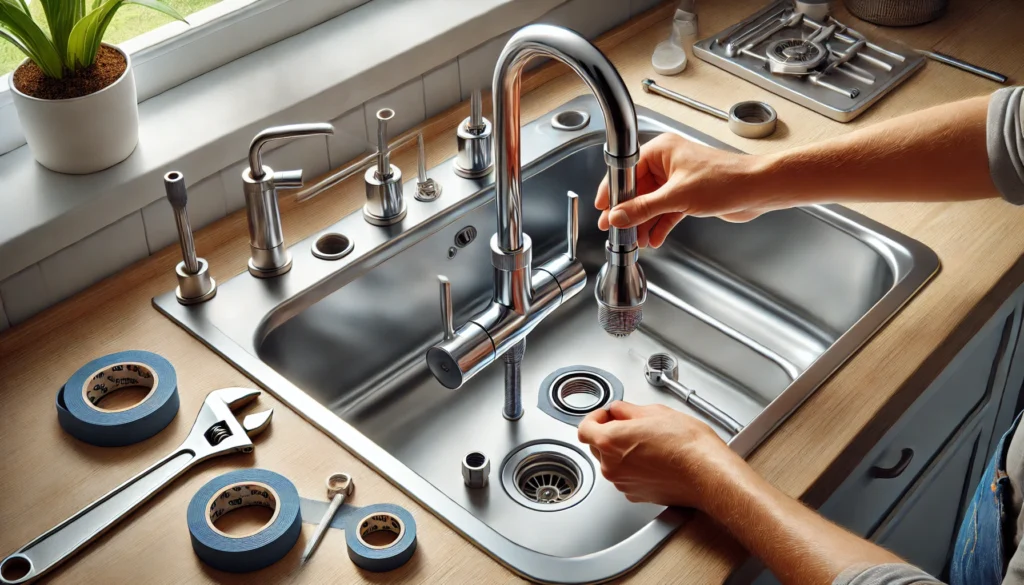
2.1 Position the New Faucet
Proper positioning is key to a successful faucet installation.
Aligning the Faucet with Mounting Holes
Place the faucet into the designated mounting holes on the sink. Ensure it is properly centered before securing it.
Using a Gasket or Plumber’s Putty if Required
Some faucets require a gasket or plumber’s putty for a secure seal. If your faucet does, apply a thin layer to prevent leaks.
2.2 Secure the Faucet in Place
After positioning, the next step is to secure the faucet firmly.
Attaching and Tightening Mounting Nuts
Slide the mounting nuts onto the faucet’s tailpieces and tighten them using a wrench. Ensure they are snug but not overtightened.
Checking Alignment Before Final Tightening
Before making final adjustments, confirm that the faucet is aligned correctly and sits flush against the sink.
2.3 Connect the Water Supply Lines
Properly connecting the water supply lines is crucial for leak-free operation.
Attaching Hot and Cold Supply Lines
Connect the hot and cold water supply lines to the corresponding faucet inlets. Use plumber’s tape on the threads to ensure a secure fit.
Ensuring Proper Connections to Avoid Leaks
Once connected, hand-tighten the fittings and then secure them with a wrench, being careful not to overtighten.
Step 3: Testing and Finishing Up
3.1 Turn On the Water Supply
Once the faucet is securely installed, it’s time to restore the water supply.
Slowly Opening the Valves
Carefully turn the shutoff valves back on, starting with a slow flow to prevent a sudden burst of pressure. If you shut off the main water supply, reopen it gradually.
Checking for Leaks
Observe the connections under the sink and around the faucet base. If you notice any drips, tighten the fittings slightly or apply additional plumber’s tape to the connections.
3.2 Test the Faucet Functionality
Testing the faucet ensures it operates correctly before finalizing the installation.
Running Hot and Cold Water
Turn the faucet handle(s) to check both hot and cold water flow. Ensure smooth operation and confirm the water temperature matches the correct side.
Ensuring Proper Water Pressure
If the water pressure is too low, remove and clean the aerator, as debris may have entered during installation. If the issue persists, double-check the supply line connections.
3.3 Apply Sealant and Clean Up
Sealing the faucet base and cleaning up completes the installation.
Using Caulk if Necessary Around the Base
If your faucet requires additional sealing, apply a thin bead of silicone caulk around the base to prevent water from seeping underneath.
Wiping Down the Faucet and Surrounding Area
Use a damp cloth to clean any fingerprints, dust, or debris from the faucet and sink area. This leaves your new faucet looking fresh and professionally installed.
Troubleshooting Common Issues
Even with careful installation, some common problems may arise. Here’s how to address them:
What to Do If the Faucet Leaks
- Check if the supply lines are fully tightened.
- Apply plumber’s tape to the connections to improve sealing.
- Ensure the mounting nuts are secure but not overtightened.
Low Water Pressure Problems
- Remove the aerator and clean any debris or sediment buildup.
- Verify that the supply valves are fully open.
- Check for kinks or blockages in the supply lines.
Loose Faucet After Installation
- Tighten the mounting nuts under the sink with a basin wrench.
- If movement persists, add a stabilizing plate or bracket for extra support.
Conclusion About How to Install a Kitchen Sink Faucet
A properly installed kitchen sink faucet improves both functionality and aesthetics in your kitchen. By following these step-by-step instructions, you can confidently replace or install a new faucet without hiring a professional.
Key takeaways:
- Always turn off the water supply before beginning.
- Properly align and secure the faucet to prevent leaks.
- Check for leaks and test functionality after installation.
- Keep basic plumbing tools handy for any minor adjustments.
Regular maintenance and occasional cleaning will help extend the life of your faucet, ensuring smooth operation for years to come.