
Painting kitchen cabinets without sanding is an excellent way to refresh your kitchen without the hassle of heavy prep work. Sanding can be time-consuming, messy, and exhausting, but luckily, there are alternative methods that can help you achieve a smooth, durable finish without picking up sandpaper.
In this guide, we’ll walk through a step-by-step process to transform your cabinets efficiently. We’ll cover everything from preparation to priming, painting, and sealing, ensuring that your cabinets not only look great but also last for years. Whether you’re a DIY enthusiast or a first-time painter, this method will save you time and effort while still delivering professional-quality results.
Skipping sanding doesn’t mean skipping prep altogether. Proper cleaning, deglossing, and priming are crucial to ensure that the paint adheres well and doesn’t chip or peel over time. Additionally, choosing the right paint and topcoat can make a significant difference in the durability and appearance of your cabinets.
By following these steps carefully, you can achieve a flawless and long-lasting kitchen makeover without the mess and effort of traditional sanding. Let’s dive in!
Why Skip Sanding?
Sanding has long been considered a necessary step in cabinet painting because it removes the glossy finish, allowing paint to adhere better. However, sanding creates a lot of dust, takes significant time, and can be physically demanding, especially for larger kitchen projects.
By skipping sanding, you eliminate the mess and speed up the process, making it more accessible for beginners and homeowners who want a quick update. The key to achieving a smooth, durable finish without sanding lies in using proper alternatives like liquid deglossers, high-quality primers, and the right paint type.
Additionally, many modern primers and paints are specifically designed to bond to glossy surfaces, eliminating the need for sanding altogether. With advancements in paint technology, skipping sanding is now a viable option that still ensures a strong, professional-looking finish.
Benefits of Painting Without Sanding
Painting kitchen cabinets without sanding offers several advantages:
- Time-Saving – Sanding can take hours, if not days. Skipping it speeds up the entire process.
- Less Mess – No need to worry about dust covering your kitchen.
- Easier for Beginners – No special sanding equipment or techniques required.
- Protects Cabinet Surface – Sanding can sometimes damage thin wood veneers.
- Works with Modern Paints – Advanced bonding primers and deglossers help paint adhere without sanding.
By using alternative preparation methods, you can still achieve a professional-looking finish without the drawbacks of traditional sanding.
Best Paints for No-Sand Cabinet Makeovers
When choosing a paint for your cabinets, it’s essential to select one that is specifically designed for durability and adhesion. Some of the best options include:
- Acrylic Latex Paint – Easy to use and cleans up with water.
- Chalk Paint – Adheres well to most surfaces but requires a topcoat.
- Oil-Based Paint – Highly durable but takes longer to dry.
- Cabinet-Specific Paints – Designed for high adhesion and durability.
The right paint choice will ensure that your cabinets not only look good but also withstand daily wear and tear.
Step 1: Preparing the Cabinets
Proper preparation is the key to achieving a smooth, long-lasting finish on your kitchen cabinets. While skipping sanding saves time, you must still take steps to ensure the paint adheres well. Cleaning, removing hardware, and protecting surrounding areas are essential steps before applying paint.
Failing to prepare the surface properly can lead to peeling, uneven paint, or stains seeping through. Since kitchen cabinets accumulate grease, grime, and food particles over time, cleaning them thoroughly is the first crucial step. Removing doors and hardware allows for a more professional application, ensuring paint reaches all surfaces evenly.
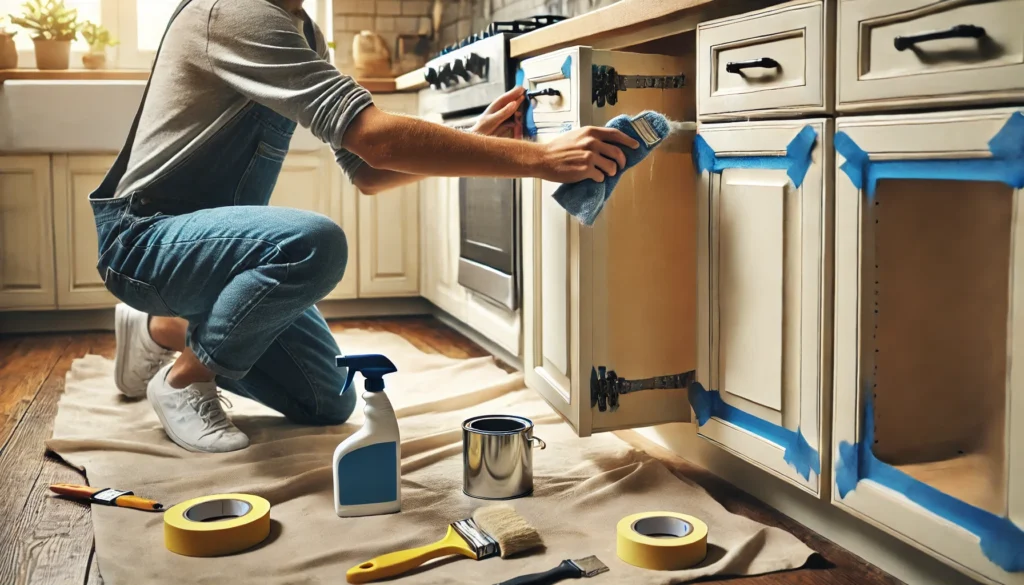
Additionally, protecting countertops, floors, and appliances from accidental paint splatters is vital. Using painter’s tape and drop cloths can save you time on cleanup and prevent unwanted messes.
Skipping sanding doesn’t mean skipping preparation! By following these steps carefully, you’ll create the perfect foundation for a flawless paint job.
1.1 Cleaning the Cabinets Thoroughly
Why Cleaning is Essential
Before applying any paint or primer, kitchen cabinets must be completely free of grease, dirt, and residue. Kitchens are prone to accumulating oils from cooking, and if these aren’t removed, the paint may not stick properly. Even high-quality primers can struggle to adhere to greasy surfaces, leading to peeling or an uneven finish.
Cleaning also removes dust and food particles that can create bumps and imperfections in the paint. The smoother and cleaner the surface, the better the final result. Skipping this step can cause long-term issues with durability, making it a critical part of the process.
Best Degreasers for Kitchen Cabinets
To remove grease and grime effectively, consider using one of these highly recommended degreasers:
- TSP (Trisodium Phosphate): A strong cleaner that cuts through heavy grease but must be rinsed thoroughly.
- Krud Kutter: A non-toxic degreaser that works well on cabinets.
- Vinegar and Baking Soda: A natural alternative for light grease removal.
- Dawn Dish Soap: A mild but effective option for cleaning cabinets before painting.
Apply the cleaner with a sponge or microfiber cloth, scrubbing any areas with heavy grease buildup. For stubborn spots, let the degreaser sit for a few minutes before wiping it off.
How to Remove Grease and Dirt Effectively
- Mix Your Cleaning Solution – If using TSP, follow the manufacturer’s dilution instructions. If using dish soap, mix warm water with a few drops of soap.
- Wipe Down All Surfaces – Use a damp sponge or cloth to clean the cabinets, focusing on handles and edges where grease accumulates.
- Rinse with Clean Water – Any leftover cleaner can affect paint adhesion, so wipe with a clean, damp cloth.
- Let Cabinets Dry Completely – Allow at least an hour before moving on to the next step.
1.2 Removing Cabinet Doors & Hardware
Labeling Doors for Easy Reassembly
When removing cabinet doors, keeping track of their original placement is crucial. Cabinets often look similar, but reattaching them in the wrong order can create alignment issues.
Here’s how to stay organized:
- Use Numbered Stickers – Place a small piece of painter’s tape inside each door and label them with numbers.
- Draw a Simple Layout – Sketch your kitchen layout on paper and mark where each door belongs.
- Store Hinges and Screws Together – Place all hardware in labeled plastic bags to prevent losing pieces.
By staying organized, you’ll save time and frustration when reinstalling the doors after painting.
Tools Needed to Remove Hinges and Handles
To remove doors and hardware efficiently, gather these basic tools:
- Screwdriver or Drill – A power drill speeds up the process, but a manual screwdriver works too.
- Plastic Baggies – To store screws and hinges separately for each cabinet.
- Painter’s Tape and Marker – For labeling doors and drawers.
- Small Container – To hold all hardware in one place and prevent losing parts.
Using the right tools ensures a smooth removal process without damaging the cabinets.
1.3 Protecting Surrounding Areas
Using Painter’s Tape and Drop Cloths
Painting can get messy, so it’s essential to protect areas you don’t want painted. Painter’s tape helps create clean lines, and drop cloths shield floors and countertops from accidental drips.
How to Use Painter’s Tape Effectively:
- Apply it along the edges where cabinets meet walls.
- Press firmly to prevent paint from seeping underneath.
- Remove the tape carefully once the paint is dry to avoid peeling.
Best Drop Cloths for the Job:
- Canvas Drop Cloths: Durable and reusable.
- Plastic Sheeting: Great for covering appliances and countertops.
- Paper Drop Cloths: Budget-friendly but disposable.
Taking these precautions makes cleanup much easier and ensures a more professional-looking result.
Covering Countertops and Floors
Spilled paint can be tough to remove, so cover all nearby surfaces before you start.
- Lay Down Drop Cloths: Tape them down to keep them in place.
- Use Plastic Wrap for Appliances: Protect your stove, fridge, and dishwasher.
- Cover Handles and Fixtures: Wrap them in plastic or aluminum foil.
Properly covering surfaces helps avoid unnecessary cleanup and keeps your kitchen looking neat throughout the project.
Step 2: Applying an Alternative to Sanding
Skipping the sanding process can save time and effort, but you still need an alternative method to ensure the paint adheres properly. The best way to do this is by using a liquid deglosser (also known as liquid sandpaper) and applying a strong bonding primer. These two steps help create a smooth surface that allows paint to stick without peeling or chipping over time.
Liquid deglossers are designed to remove the glossy layer from cabinets, making them more receptive to primer and paint. Using a bonding primer further ensures that your new paint job will be durable and long-lasting.
By following this step, you’ll achieve professional-looking results without the mess and labor of traditional sanding.
2.1 Using a Liquid Deglosser (Liquid Sandpaper)
What is a Liquid Deglosser?
A liquid deglosser is a chemical solution that helps dull and break down the glossy finish of cabinets, making it easier for paint to adhere. Unlike traditional sanding, which physically roughens the surface, a deglosser chemically alters it, removing the need for dust and hard labor.
How to Apply It Properly
- Choose a High-Quality Deglosser: Look for brands like Klean-Strip, Jasco, or Krud Kutter that work well on kitchen cabinets.
- Work in a Ventilated Area: Open windows and wear gloves and a mask to avoid inhaling fumes.
- Apply with a Lint-Free Cloth: Pour a small amount of deglosser onto a cloth and rub it over the cabinet surface in circular motions.
- Let it Dry Completely: Most deglossers dry within 10–15 minutes. Some require wiping off excess residue with a clean cloth.
Using a deglosser ensures that the paint bonds well, preventing peeling or chipping later.
2.2 Priming the Cabinets for Paint
Choosing the Right Bonding Primer
A high-quality bonding primer is essential when painting cabinets without sanding. Bonding primers are formulated to adhere to slick surfaces, ensuring your paint sticks properly.
Best Bonding Primers for Kitchen Cabinets:
- Zinsser BIN Shellac-Based Primer: Excellent adhesion, dries quickly.
- Kilz Adhesion Primer: Great for laminate and glossy wood surfaces.
- Rust-Oleum Bonding Primer: Works well on high-use surfaces like kitchen cabinets.
How to Apply Primer Evenly
- Use a High-Quality Brush or Roller: A foam roller provides a smooth finish, while a brush helps reach edges and corners.
- Apply a Thin, Even Coat: Avoid overloading the surface with too much primer.
- Allow Proper Drying Time: Check the manufacturer’s instructions (usually 1–2 hours).
- Lightly Sand if Necessary: If the surface feels rough after priming, a gentle sanding with fine-grit sandpaper (320-grit) can help smooth it out before painting.
Now that your cabinets are prepped, it’s time to start painting.
Read More: how much does it cost to paint kitchen cabinets
Step 3: Painting the Cabinets
Painting is where your cabinets truly start transforming. Choosing the right paint, applying it correctly, and ensuring even coverage will determine the final look and durability of your project.
3.1 Choosing the Right Paint
Oil-Based vs. Water-Based Paints
- Oil-Based Paint: Extremely durable, but has strong fumes and takes longer to dry.
- Water-Based (Acrylic or Latex) Paint: Dries faster, has fewer fumes, and is easier to clean up.
- Hybrid Paints: Some paints, like alkyd waterborne enamels, combine the durability of oil-based paint with the easy cleanup of latex.
Best Paint Finishes for Kitchen Cabinets
- Satin Finish: Low sheen, easy to clean, and hides imperfections.
- Semi-Gloss Finish: More durable, resists stains, and reflects light well.
- Glossy Finish: Very durable but can highlight surface imperfections.
3.2 Applying the First Coat of Paint
Brush vs. Roller vs. Spray Application
- Brush: Best for detailed areas and edges.
- Foam Roller: Creates a smooth, streak-free finish.
- Spray Application: Provides a professional finish but requires proper setup and ventilation.
How to Avoid Streaks and Brush Marks
- Use Light, Even Strokes: Avoid applying too much paint at once.
- Work in Sections: Start with edges and then move to flat areas.
- Keep a Wet Edge: Work quickly to prevent visible lines where the paint dries too soon.
3.3 Adding a Second Coat for Durability
How Long to Wait Between Coats
Most paints require at least 4–6 hours of drying time between coats. Rushing this step can lead to uneven application and peeling.
Checking for Uneven Areas
Before applying the second coat, check for any thin spots or areas where the first coat did not fully cover. Lightly sanding with 320-grit sandpaper can help smooth the surface before reapplying.
Step 4: Sealing and Reassembling
Once the paint has fully dried, applying a protective topcoat and reinstalling the cabinet doors will complete the project.
4.1 Applying a Protective Topcoat (Optional but Recommended)
Types of Topcoats (Polyurethane, Polycrylic)
- Polyurethane: Extremely durable but can yellow over time.
- Polycrylic: Water-based, dries clear, and won’t yellow over time.
How to Apply for a Smooth Finish
- Use a High-Quality Brush or Sprayer: Apply in thin, even coats.
- Let Each Coat Dry Fully: Wait at least 2 hours between coats.
- Apply 2–3 Coats for Maximum Protection.
4.2 Reattaching Cabinet Doors and Hardware
Ensuring Proper Alignment
When reattaching the cabinet doors, use your numbered labels to match them with their original positions. Make sure hinges are properly aligned for smooth opening and closing.
Cleaning Up and Final Touches
Once the cabinets are fully assembled, wipe down any excess dust or fingerprints and step back to admire your work!
Conclusion
How Long to Let the Paint Cure
Although paint may feel dry to the touch after a few hours, full curing can take 7–14 days. Avoid heavy use during this period to prevent damage.
Maintenance Tips for Long-Lasting Cabinet Paint
- Use Mild Cleaners: Avoid harsh chemicals that could wear down the paint.
- Wipe Spills Immediately: Prevent stains and discoloration.
- Avoid Excessive Moisture: Keep cabinets dry to maintain their finish.
Common Mistakes to Avoid
- Skipping Cleaning: Leads to poor adhesion.
- Not Using Primer: Increases the risk of peeling paint.
- Applying Too Much Paint at Once: Results in drips and uneven coverage.
By following these steps carefully, you can successfully paint your kitchen cabinets without sanding, saving time and effort while still achieving a professional finish.