A Delta kitchen faucet is a great investment for any home, known for its durability and high performance. However, over time, the internal cartridge may wear out, causing leaks, inconsistent water flow, or difficulty in operation. Replacing the cartridge is a simple yet crucial task that can restore the functionality of your faucet without the need for a professional plumber.
This guide provides a step-by-step approach to replacing a Delta kitchen faucet cartridge, ensuring a smooth and hassle-free process. Whether your faucet is leaking or failing to deliver water properly, a new cartridge can resolve the issue quickly.
In this guide, we will cover:
- Why you might need to replace the cartridge
- Signs that indicate a faulty cartridge
- Tools and materials required
- Step-by-step instructions for removing the old cartridge and installing a new one
- Testing and troubleshooting after installation
By following this comprehensive guide, you can save money on plumbing repairs and maintain your kitchen faucet in top condition. Let’s dive into the details of why a cartridge replacement is necessary and what tools you need before starting.
Overview of Delta Kitchen Faucet Cartridges
A Delta kitchen faucet cartridge is an internal component that regulates water flow and temperature. It operates by controlling the movement of water within the faucet body. Unlike traditional washers, cartridge faucets rely on a movable ceramic disc or plastic piece to allow or stop water flow, making them more durable and less prone to leaks.
Most Delta faucets use single-handle cartridges, which control both hot and cold water. However, some models may have dual-handle cartridges that separate hot and cold water flow. Over time, cartridges may wear out due to hard water deposits, debris, or general usage. When this happens, replacing the cartridge becomes necessary.
Why You Might Need to Replace the Cartridge
There are several reasons why a Delta kitchen faucet cartridge might need replacement:
- Leaks Around the Faucet Base or Handle – A worn-out cartridge can allow water to seep through, causing leaks around the handle or base.
- Difficulty in Turning the Faucet Handle – If the handle becomes stiff or hard to operate, it may be due to mineral buildup inside the cartridge.
- Inconsistent Water Temperature or Flow – If you experience sudden changes in water temperature or pressure, the cartridge may not be functioning properly.
- Water Keeps Dripping Even When Turned Off – A faulty cartridge may fail to create a tight seal, leading to continuous dripping.
If you notice any of these issues, replacing the cartridge is the best solution to restore smooth operation and prevent water wastage.
Signs That Indicate a Faulty Cartridge
Identifying a failing cartridge early can save you from water damage and high utility bills. Here are some common signs that suggest a cartridge replacement is needed:
- Persistent Dripping or Leaking – Even after turning off the faucet, water continues to drip.
- Stiff or Loose Handle Movement – The handle becomes harder to move or feels loose and wobbly.
- Low Water Pressure – A clogged or worn-out cartridge can reduce water flow.
- Hot and Cold Water Mixing Issues – Difficulty in adjusting the temperature or receiving unexpected bursts of hot or cold water.
If you experience any of these issues, replacing the cartridge is the most effective solution to restore your faucet’s normal operation.
Tools and Materials Needed
Before you start replacing the cartridge, gather the necessary tools and materials to ensure a smooth process. Here’s what you’ll need:
- Replacement Delta Faucet Cartridge – Ensure compatibility with your faucet model.
- Adjustable Wrench – Used for loosening and tightening nuts.
- Phillips Screwdriver – Required for removing certain screws.
- Allen Wrench (Hex Key) – Needed to remove the faucet handle.
- Plumber’s Grease – Helps lubricate the new cartridge for smooth operation.
- Bucket or Towel – Prevents water from spilling onto the floor.
- Vinegar – Useful for cleaning mineral deposits inside the faucet housing.
Having these items on hand will make the replacement process efficient and hassle-free.
Step 1: Preparing for the Cartridge Replacement
Replacing a Delta kitchen faucet cartridge requires proper preparation to avoid damage or water leaks. This step ensures you are ready to proceed safely.
1.1 Gather Necessary Tools & Materials
Before starting, collect all the required tools mentioned earlier. Using the correct tools will prevent damage to the faucet components and ensure a smooth installation.
1.2 Turn Off the Water Supply
To prevent water from gushing out while replacing the cartridge, turn off the water supply by following these steps:
- Locate the shut-off valves under the sink (one for hot and one for cold water).
- Turn both valves clockwise to shut off the water completely.
- Open the faucet to release any remaining water pressure before removing the cartridge.
Turning off the water supply prevents flooding and makes it easier to remove the old cartridge safely.
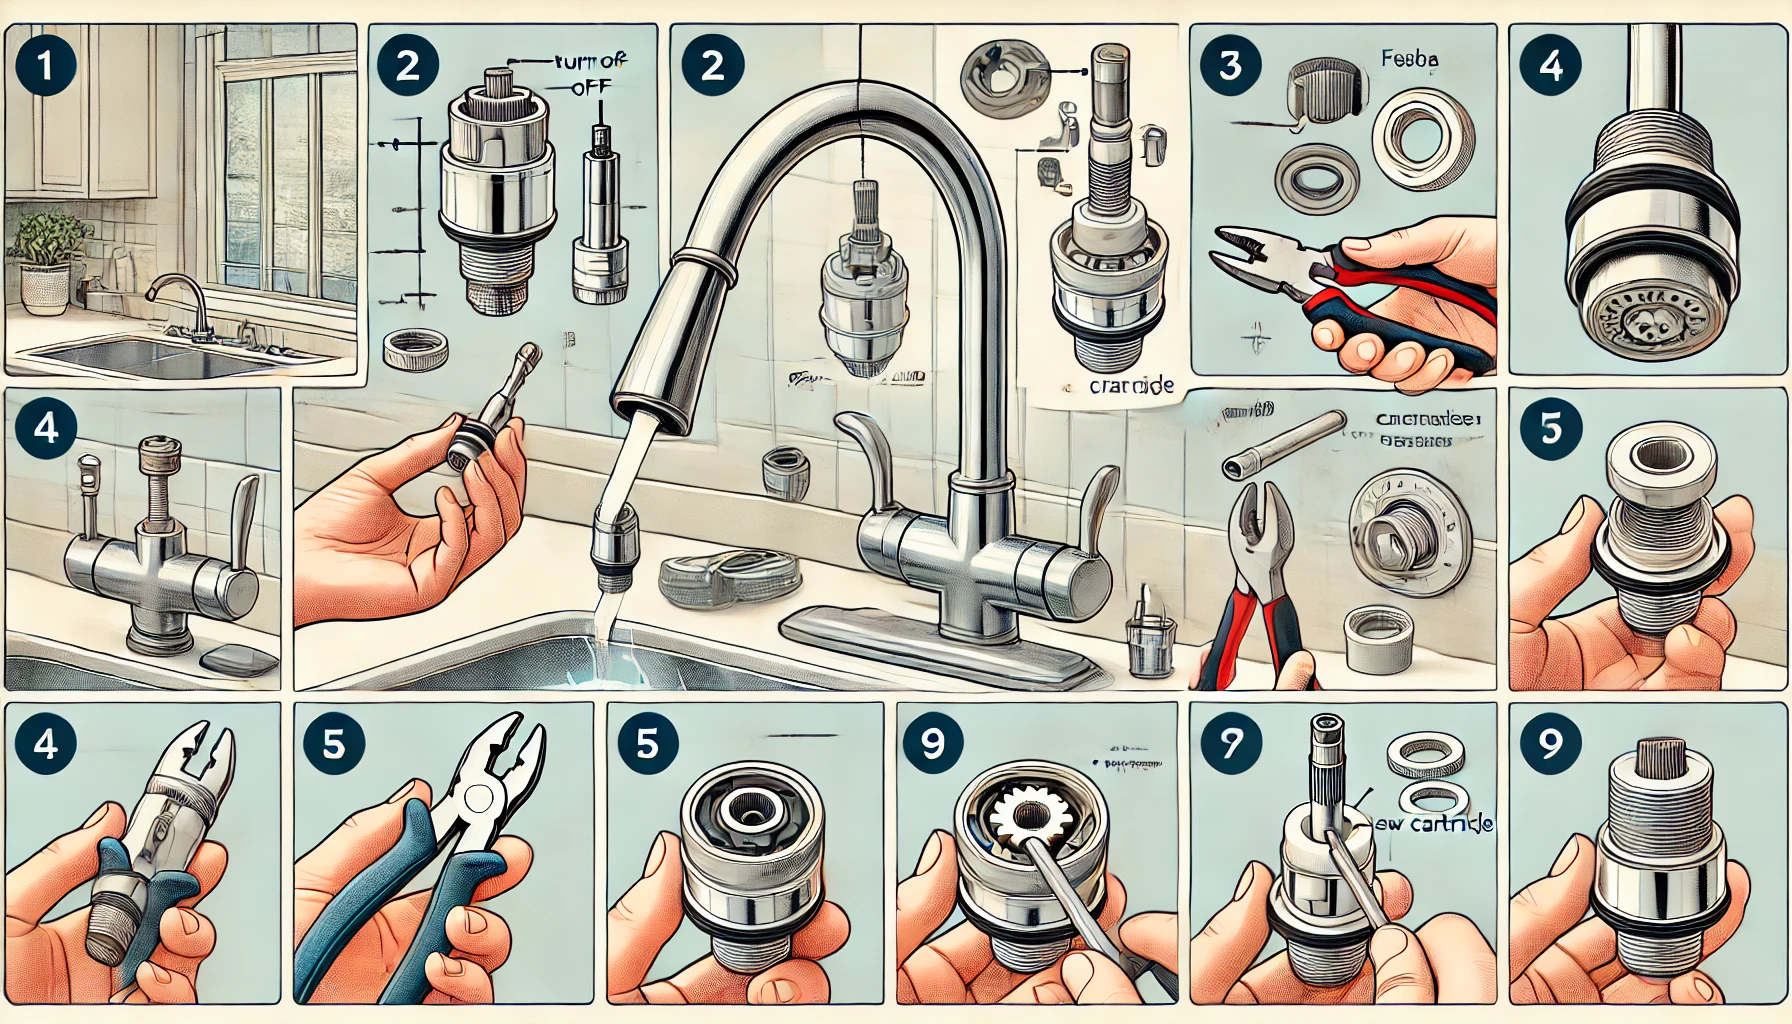
Step 2: Removing the Old Cartridge

Once you’ve prepared, the next step is to remove the faulty cartridge from the faucet. This process involves disassembling key parts of the faucet.
2.1 Remove the Faucet Handle
The handle must be removed to access the cartridge:
- Locate the set screw under the faucet handle.
- Use an Allen wrench (Hex key) to loosen the screw by turning it counterclockwise.
- Gently pull the handle off to expose the cartridge and retaining nut.
2.2 Take Off the Retaining Nut and Bonnet Nut
To secure the cartridge, most Delta faucets have a retaining nut or bonnet nut that needs removal:
- Use an adjustable wrench to loosen the retaining nut.
- Carefully remove the bonnet nut if your model has one.
- Keep these parts safe, as they will be reused during installation.
2.3 Extract the Old Cartridge
Now, it’s time to remove the old cartridge:
- Grip the cartridge with pliers and pull it straight up.
- If the cartridge is stuck, wiggle it gently to loosen any mineral buildup.
- Inspect the old cartridge for cracks, wear, or damage.
Read More: how to install a kitchen sink faucet
Step 3: Installing the New Cartridge
Now that the old cartridge has been removed, it’s time to install the new one. Proper installation ensures the faucet functions smoothly without leaks. Follow these steps carefully to align and secure the cartridge correctly.
3.1 Clean the Faucet Housing
Before inserting the new cartridge, it’s important to clean the faucet housing to remove any debris or mineral buildup that could interfere with the new installation.
- Use a clean cloth or paper towel to wipe away any dirt or old grease inside the housing.
- If there are hard water deposits, soak a cloth in vinegar and gently rub the area to dissolve buildup.
- Ensure the inside of the faucet is dry before proceeding with the new cartridge installation.
This step prevents future leaks and ensures a secure fit for the new cartridge.
3.2 Insert the New Cartridge
Installing the new cartridge requires careful alignment to match the faucet’s internal structure.
- Check the orientation of the new cartridge. Most Delta cartridges have small tabs or notches that should align with the faucet slots.
- Insert the cartridge firmly into the faucet housing. It should slide in smoothly without force.
- Double-check that the cartridge is properly seated. Misalignment can cause leaks or improper water flow.
If the cartridge doesn’t fit easily, avoid using excessive force—realign and try again.
3.3 Reattach the Retaining Nut and Bonnet Nut
Once the cartridge is in place, secure it by reinstalling the retaining nut and bonnet nut.
- Place the retaining nut back over the cartridge and tighten it using an adjustable wrench.
- If your model has a bonnet nut, reinstall it carefully.
- Avoid overtightening, as this can damage the cartridge or faucet threads.
A secure fit ensures the cartridge stays in place and prevents leaks.
3.4 Reinstall the Faucet Handle
With the cartridge secured, reinstall the faucet handle:
- Slide the handle back onto the cartridge stem.
- Insert and tighten the set screw using an Allen wrench (Hex key).
- Ensure the handle moves smoothly and controls water flow properly.
This completes the cartridge replacement! Now, it’s time to test the faucet and ensure everything is working correctly.
Read More: how to install a new kitchen sink faucet
Step 4: Testing and Final Adjustments
Before wrapping up, you need to test the faucet to check for leaks and ensure proper operation.
4.1 Turn the Water Supply Back On
After installing the new cartridge, restore the water supply:
- Slowly open the shut-off valves under the sink.
- Check around the faucet base and handle for leaks.
- If you see any leaks, tighten the retaining nut slightly or ensure the cartridge is seated properly.
Turning the water on slowly prevents sudden pressure surges that could dislodge the cartridge.
4.2 Flush the Faucet
To remove air bubbles and any debris from the installation process, flush the faucet properly:
- Turn on the faucet fully and let the water run for a few minutes.
- Switch between hot and cold water to check temperature control.
- Look for any irregularities in water flow or pressure.
Flushing the faucet ensures clean water flow and removes any trapped air in the system.
4.3 Check for Smooth Operation
Finally, test the faucet’s functionality:
- Move the handle in different directions to ensure smooth operation.
- Check if the water flow is steady without sputtering or delays.
- Make small adjustments if needed (e.g., tightening screws or repositioning the handle).
If everything runs smoothly, you have successfully replaced your Delta kitchen faucet cartridge! 🎉
Conclusion About How to Change a Delta Kitchen Faucet Cartridge
Replacing a Delta kitchen faucet cartridge is a simple but essential maintenance task that can extend the lifespan of your faucet and prevent costly repairs. By following this step-by-step guide, you can:
✅ Fix leaks and improve water flow
✅ Ensure smooth handle operation
✅ Prevent future plumbing issues
Maintenance Tips to Extend the Lifespan of the New Cartridge
- Regularly clean your faucet aerator to prevent debris buildup.
- Use a water softener if you have hard water to reduce mineral deposits.
- Lubricate the cartridge occasionally with plumber’s grease for smooth movement.
- Check for leaks periodically and tighten screws if necessary.
If you experience ongoing leaks or issues despite replacing the cartridge, it may be best to consult a professional plumber for further inspection.
By taking care of your kitchen faucet, you can enjoy reliable performance for years to come! 🚰🔧