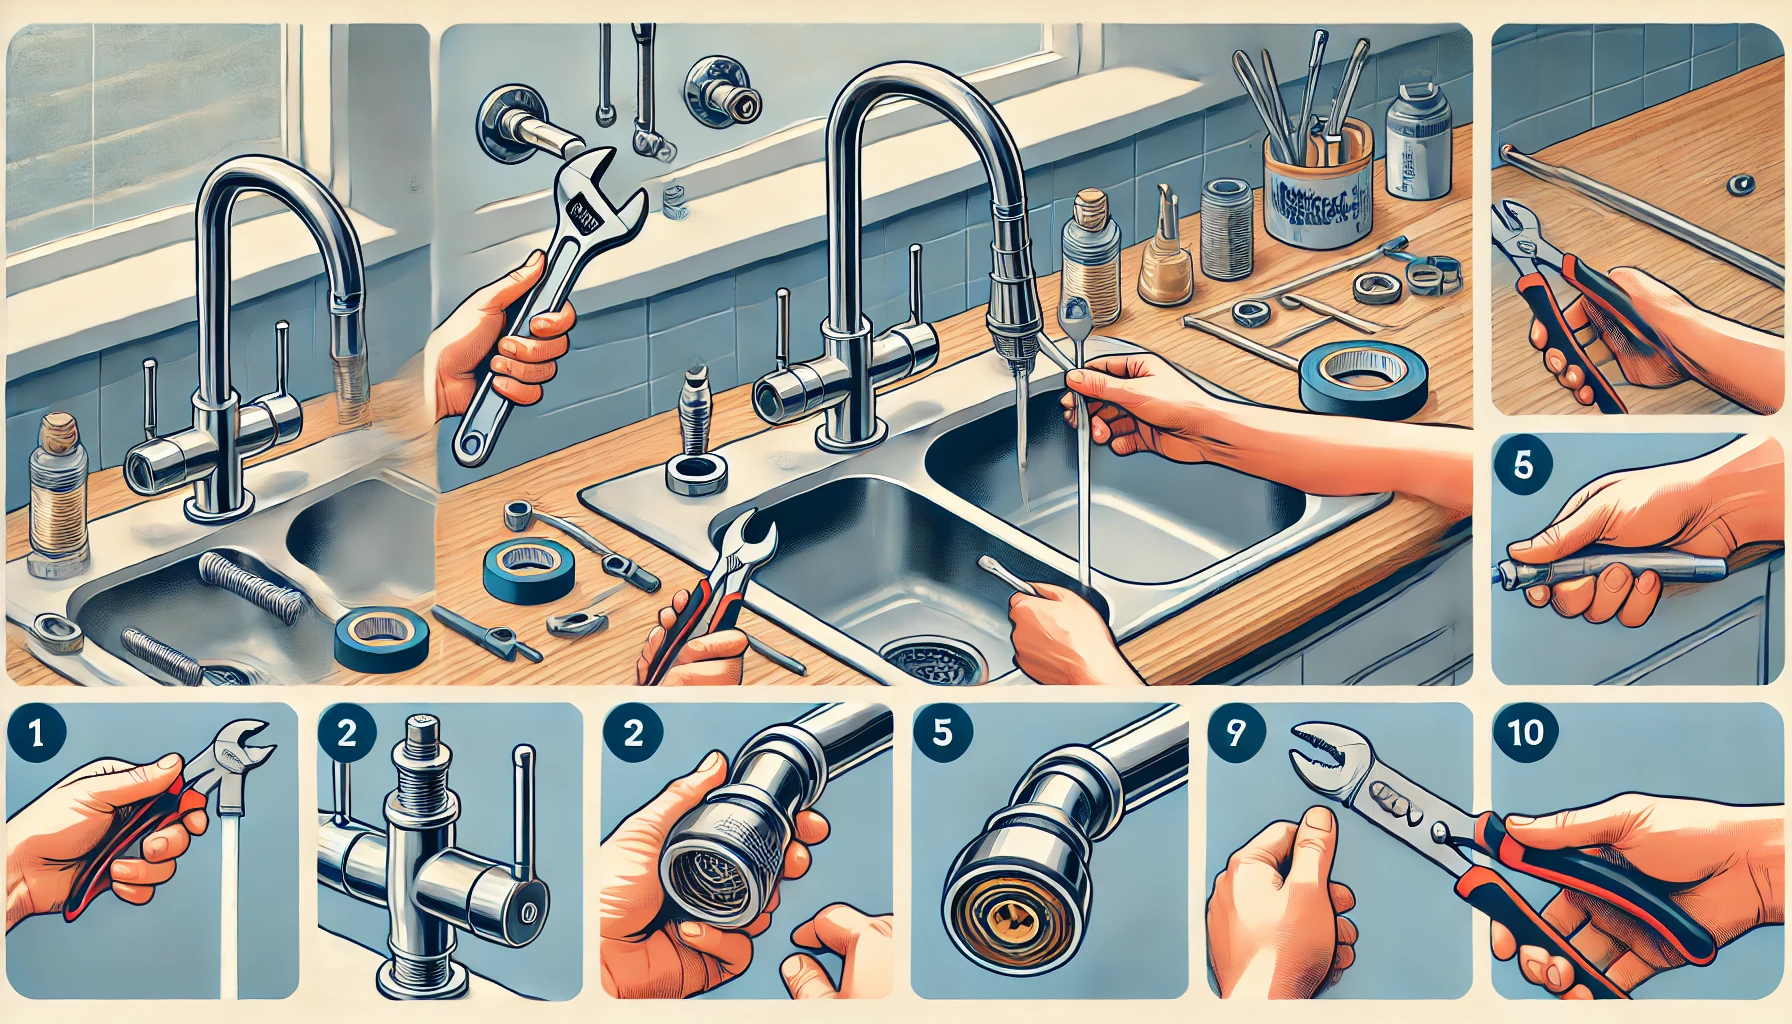
Replacing a kitchen sink faucet is a straightforward DIY task that can enhance the functionality and aesthetics of your kitchen. Whether your faucet is leaking, outdated, or malfunctioning, learning how to change it yourself can save you money and time. This guide provides a step-by-step approach to replacing a kitchen faucet, ensuring a smooth and efficient process.
Introduction
A kitchen faucet is an essential fixture that plays a crucial role in your daily routine. Over time, wear and tear can cause leaks, rust, or reduced water pressure. Replacing a faulty faucet improves water efficiency, prevents damage to your sink area, and enhances the overall look of your kitchen.
Before diving into the replacement process, it’s essential to understand why upgrading a kitchen faucet is important, what tools and materials are needed, and how to prepare for installation.
Why Replacing a Kitchen Faucet is Important
A functional and modern kitchen faucet provides convenience, efficiency, and aesthetic appeal. Here are some key reasons why you might need to replace your faucet:
- Leaks and Drips – A leaking faucet wastes water and increases utility bills.
- Low Water Pressure – Over time, mineral deposits can clog the faucet, reducing water flow.
- Outdated Design – Upgrading to a new faucet can improve the kitchen’s appearance.
- Malfunctioning Handle or Spout – Stiff or broken handles make operation difficult.
- Improved Features – Modern faucets come with features like pull-down sprayers and touchless operation.
By replacing an old faucet, you can prevent water damage, save money on repairs, and enhance your kitchen’s functionality.
Tools & Materials Needed for Faucet Replacement
Before starting, gather all the necessary tools and materials to make the installation process smooth:
- Adjustable wrench
- Basin wrench
- Bucket or towels (to catch water drips)
- Plumber’s tape
- New kitchen faucet
- Silicone sealant or plumber’s putty
- Teflon tape
- Screwdriver
- Pliers
Having the right tools ensures you can remove the old faucet and install the new one efficiently.
Step 1: Preparing for the Installation
Before installing a new faucet, proper preparation is key. This step includes turning off the water supply, clearing the sink area, and ensuring safety.
Shutting Off the Water Supply
The first step in replacing a kitchen faucet is shutting off the water supply to prevent leaks and spills. Locate the shut-off valves under the sink and turn them clockwise until the water stops flowing. If there are no individual shut-off valves, turn off the main water supply.
After shutting off the water, turn on the faucet to release any remaining water pressure from the lines. This step prevents unexpected water leakage during removal.
Gathering the Necessary Tools and Materials
Before beginning, ensure all tools and materials listed earlier are within reach. This prevents interruptions and makes the process more efficient. If you are missing a specific tool, consider purchasing or borrowing it before proceeding.
Clearing Out the Area Under the Sink
The space under the sink is often cluttered with cleaning supplies and household items. Remove everything to create a clear workspace. Placing a towel or bucket under the sink can help catch any residual water that drips when disconnecting the faucet.
Taking Safety Precautions
Safety is crucial when working under the sink. Ensure good lighting, wear protective gloves if needed, and be cautious when using tools. If the plumbing system is old, check for corrosion or weak connections before proceeding.
Step 2: Removing the Old Faucet
Once the preparation is complete, the next step is to remove the existing faucet. This involves disconnecting the water supply lines, loosening the mounting nuts, and detaching the old faucet.
Disconnecting the Water Supply Lines
Using an adjustable wrench, loosen the nuts that connect the water supply lines to the faucet. Be prepared for some residual water to leak out, so keep a bucket or towel handy. If the nuts are difficult to turn, apply penetrating oil and wait a few minutes before trying again.
Loosening and Removing the Mounting Nuts
The faucet is secured to the sink with mounting nuts located underneath. Use a basin wrench to reach and loosen these nuts. Once they are loosened, carefully remove them by hand.
Detaching the Old Faucet from the Sink
After removing the mounting nuts, lift the old faucet from the sink. If the faucet is stuck due to old sealant or rust, gently wiggle it or use a putty knife to break the seal.
Cleaning the Sink Surface Before Installation
Before installing the new faucet, clean the area where the old faucet was attached. Remove any old plumber’s putty, grime, or mineral buildup using a mild cleaner and a cloth. This ensures a smooth surface for the new faucet installation.
Read More: how to install a kitchen sink faucet
Step 3: Installing the New Faucet
With the old faucet removed, it’s time to install the new one. This step involves positioning the faucet, securing it, and connecting the water supply lines.
Positioning the New Faucet in Place
Place the new faucet into the mounting holes on the sink. Ensure it is correctly aligned and sits evenly. If your faucet comes with a gasket, position it between the faucet base and the sink to prevent leaks.
Securing the Faucet with Mounting Nuts
Under the sink, thread the mounting nuts onto the faucet’s tailpieces and tighten them securely. Use a basin wrench for a firm fit, but avoid overtightening, as it could damage the sink.
Connecting the Water Supply Lines
Attach the water supply lines to the faucet’s corresponding hot and cold inlets. Tighten the connections with an adjustable wrench, using Teflon tape on the threads to prevent leaks.
Ensuring Proper Seal and Leak Prevention
Before turning on the water, check all connections for tightness. Apply a small amount of plumber’s putty or silicone sealant around the faucet base if necessary to prevent leaks.
Step 4: Testing and Final Adjustments
Once the new faucet is installed, the final step is to test it for leaks and make any necessary adjustments.
Turning the Water Supply Back On
Slowly turn on the water supply valves and allow water to flow through the new faucet. Check for any leaks at the supply line connections and under the sink.
Checking for Leaks and Fixing Any Issues
If you notice any leaks, tighten the connections slightly or apply additional Teflon tape. Ensure there are no drips from the faucet base or water supply lines.
Adjusting Water Flow and Faucet Operation
Turn the faucet on and off, checking for smooth operation. Adjust the water pressure and temperature as needed to ensure the faucet functions correctly.
Cleaning Up the Work Area
Once everything is working properly, clean up the workspace. Remove any tools, wipe down the sink, and return items to their storage area under the sink.
Conclusion About How to change a kitchen sink faucet
Common Mistakes to Avoid When Replacing a Faucet
- Forgetting to turn off the water supply before starting
- Over-tightening connections, which can lead to leaks
- Using the wrong type of sealant or plumber’s putty
- Not checking for leaks before finishing the job
Maintenance Tips for Your New Kitchen Faucet
- Clean the faucet regularly to prevent mineral buildup
- Check for leaks periodically to avoid major issues
- Replace washers and O-rings if the faucet starts dripping
When to Call a Professional Plumber
If you encounter major plumbing issues, such as corroded pipes or persistent leaks, it’s best to call a professional plumber to ensure proper installation and avoid costly damage.
By following this guide, you can successfully replace your kitchen faucet and enjoy improved functionality in your kitchen.